Introduction to Cookie Butter Icebox Cake
If you haven’t delved into the delightful world of a cookie butter icebox cake, you’re in for a real treat. This dessert is the perfect blend of creamy, crunchy, and sweet, making it an irresistible addition to your dessert repertoire. Whether it’s for a casual gathering or a special occasion, a cookie butter icebox cake promises to dazzle your friends and family.
Why cookie butter icebox cake is a must-try dessert?
So, what makes this cake stand out among countless other desserts? For starters, the cookie butter itself is a game changer—imagine the taste of your favorite spiced cookies, blended into a smooth and luscious spread. It’s nostalgic yet innovative, capturing everything you love about fall flavors in a conveniently spreadable form. When paired with whipped cream and layers of crumbled cookies, it creates a light, airy structure that’s both satisfying and invigorating.
Here are a few reasons why the cookie butter icebox cake deserves a spot on your must-try list:
- Ease of Preparation: Unlike traditional cakes, there’s no baking involved. Just layer your ingredients and let the fridge do the work—perfect for busy lifestyles.
- Versatility: Feel free to customize it! Use different types of cookies or swap out the whipped cream for non-dairy options. You can make it your own!
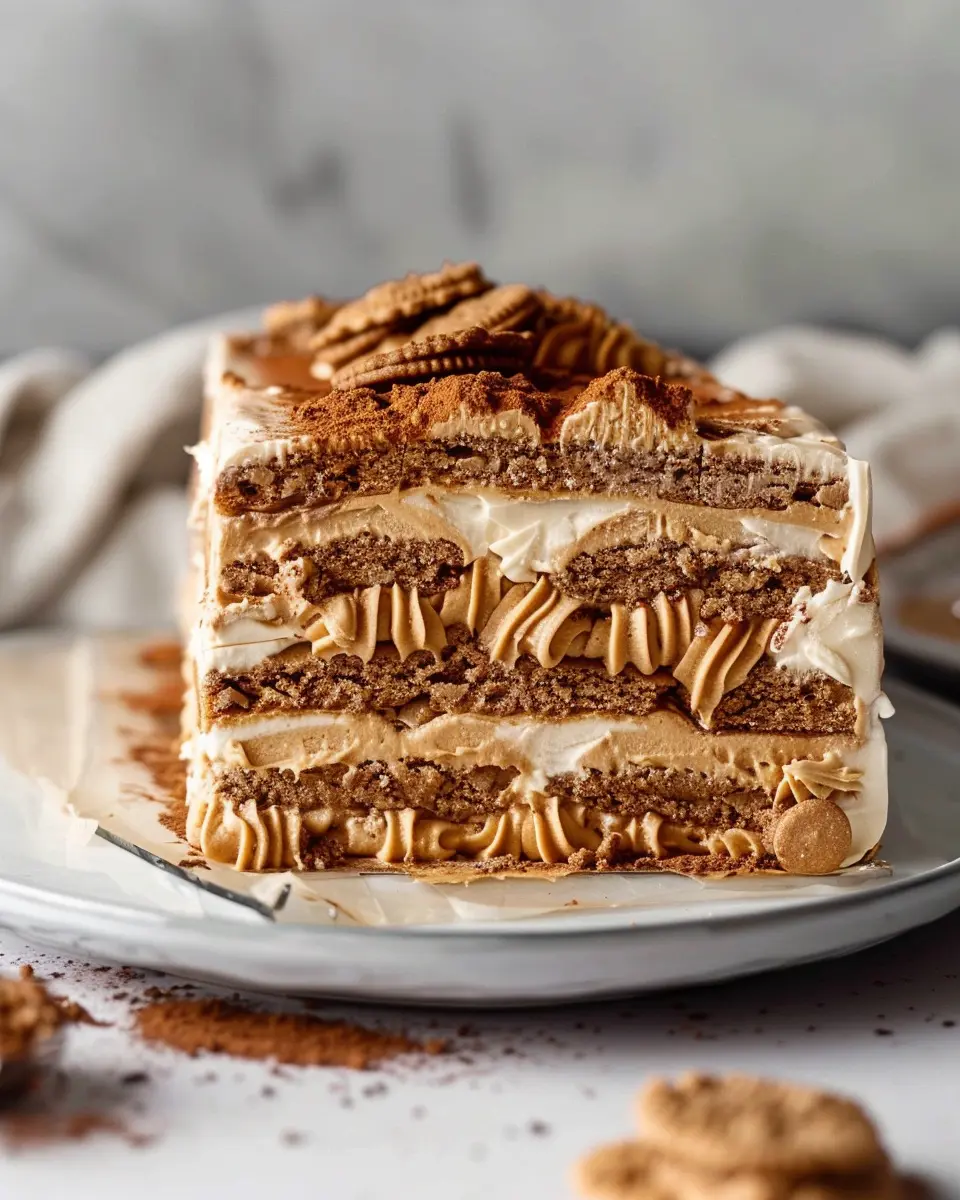
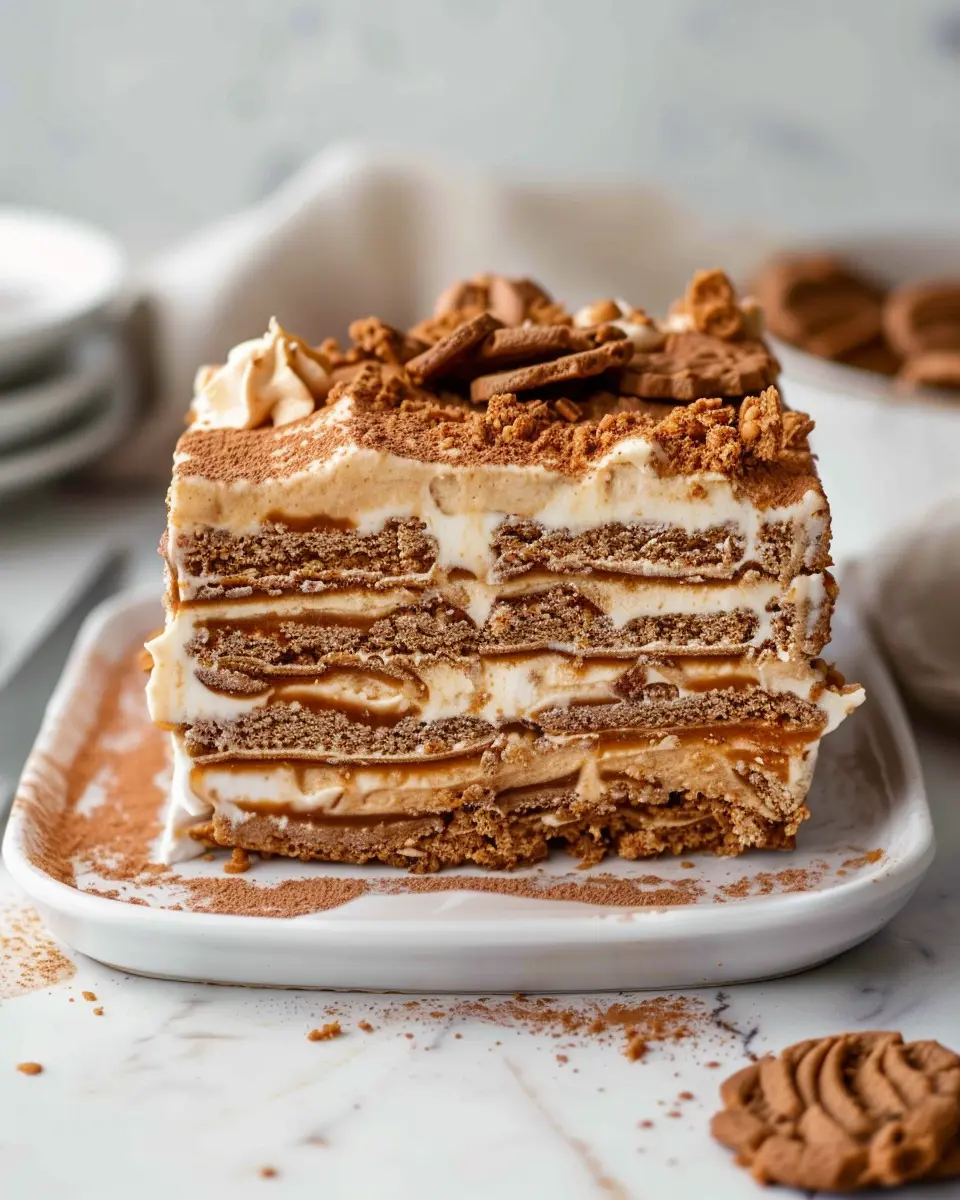
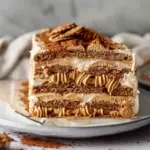
- Impressive Presentation: When you cut into this cake, it reveals beautiful layers that are not only stunning but sure to impress your guests. It’s basically a showstopper in a dessert!
Plus, there’s something inherently satisfying about a dessert that gets better as it sits. The longer the layers chill together, the more the flavors meld, creating a rich and indulging taste experience.
Still need a little convincing? Consider this: The cookie butter icebox cake is a crowd-pleaser that caters to both adults and kids. Everyone will savor every spoonful, and it’s a delightful conversation starter.
Ready to give it a whirl? Stick around, and I’ll guide you through making this delectable dessert that just might become your new go-to treat. For even more inspiration, check out Bakerella’s blog where dessert lovers find fresh ideas and recipes.
Ingredients for Cookie Butter Icebox Cake
Essential ingredients for a delicious cake
To whip up a tempting cookie butter icebox cake, you’ll need some simple yet flavorful components. Here’s what makes this dessert truly stand out:
- Cookie Butter: The star ingredient, bringing that sweet, spicy, and nutty flavor that makes your taste buds dance.
- Graham Crackers: These will serve as the foundation layers, providing a delightful crunch.
- Heavy Cream: Whipped to perfection, this adds a light and airy texture to balance the rich cookie butter.
- Powdered Sugar: Just a touch to sweeten the whipped cream without overdoing it.
- Cream Cheese: This helps create that classic frosting texture.
Gather these essentials, and you’re well on your way to an irresistible treat! For more inspiration, check out this guide on the versatility of cookie butter.
Optional ingredients for personalization
Want to put your own spin on this cake? Consider adding:
- Chocolate Chips: Sprinkle in some mini chocolate chips to enhance the flavor.
- Nuts: Chopped walnuts or pecans can add a lovely crunch.
- Spices: A dash of cinnamon or nutmeg can elevate the cookie flavor.
- Fruit: Sliced bananas or strawberries can add freshness and balance the richness.
These optional ingredients allow for creativity and personalization, making each cookie butter icebox cake uniquely yours!
Preparing the Cookie Butter Icebox Cake
If you’re on the hunt for a dessert that is as effortless to make as it is delicious, look no further! The cookie butter icebox cake is the perfect no-bake treat that is sure to impress your friends and family at gatherings or cozy nights in. Let’s dive into how to create this indulgent delight!
Gather Your Equipment and Ingredients
Before you start, take a moment to assemble your ingredients and equipment. This will streamline the process and make it a more enjoyable experience. Here’s what you’ll need:
Ingredients:
- 1 cup of heavy whipping cream
- 8 oz of mascarpone cheese
- 1 cup of cookie butter, plus extra for drizzling
- 1 package of graham crackers (or your preferred cookie variety)
- A pinch of salt
- Optional: chocolate shavings or crushed cookies for garnish
Equipment:
- Mixing bowl
- Hand mixer or stand mixer
- Rubber spatula
- 9×9 inch (or similar) pan
- Parchment paper (for easier cleanup)
Whip the Heavy Cream to Perfection
Now that you’re all set up, it’s time to whip up that heavy cream. This step is crucial for adding lightness to your cookie butter icebox cake.
- In a mixing bowl, pour in the heavy whipping cream and a pinch of salt.
- Using your hand mixer (or stand mixer), whip the cream on medium speed until soft peaks form. This usually takes about 3-5 minutes. It’s important not to over-whip; you want it fluffy, not grainy!
If you’re new to whipping cream, remember to keep an eye on it. Soft peaks will bend over when you lift the beaters. Once you achieve this, set the whipped cream aside while you prepare the next layer.
Mix the Cookie Butter and Mascarpone
Next up is combining the cookie butter and mascarpone cheese. This is where the magic truly happens!
- In a separate bowl, add the mascarpone cheese and the cookie butter.
- Mix together until fully combined. You want it to be smooth and creamy. You can use a spatula for this; just be gentle to keep the mixture airy.
- Once mixed, gently fold in the whipped cream you prepared earlier using a rubber spatula. Be careful not to deflate the cream; the goal is to maintain that light, airy texture.
Pro-tip: If you want to jazz it up even more, consider adding a splash of vanilla extract or a tablespoon of powdered sugar to the cream mixture for added sweetness.
Layer the Cookies and Cream Mixture
Now comes the fun part! Layering your cookie butter icebox cake is where you can really get creative.
- Start by covering the bottom of your pan with a single layer of graham crackers (or your choice of cookies).
- Spread a layer of the cookie butter and mascarpone mixture over the cookies to cover completely.
- Repeat the process: more cookies, then more cream mixture. Aim for at least three layers, finishing with the cookie mixture on top.
Feel free to drizzle a bit of cookie butter on top for flair, or sprinkle some chocolate shavings to make it look extra indulgent!
Refrigerate and Let It Set
Patience is a virtue! After you finish layering, cover the pan with plastic wrap and refrigerate it for at least 4 hours, or preferably overnight.
This waiting period is essential as it allows the cookies to soak up the flavors and soften, creating that perfect sliceable cake texture. Imagine cutting into it the next day — the anticipation is part of the joy!
Once set, serve chilled, and watch your friends revel in delight as they enjoy every creamy, cookie-infused bite.
With this guide, you’re well on your way to serving up a fantastic cookie butter icebox cake that’s sure to become your go-to dessert. Happy baking, and enjoy!
For more recipes and inspiration, check out Taste of Home for ideas that can elevate your dessert game even further.
Variations on Cookie Butter Icebox Cake
Chocolate Cookie Butter Icebox Cake
If you’re a fan of rich flavors, why not try a chocolate cookie butter icebox cake? To achieve this delightful twist, simply swap out traditional vanilla cookies for chocolate ones. The chocolate’s decadence pairs beautifully with the creamy cookie butter filling. Here’s a quick guide to transform your cake:
- Ingredients: Use chocolate sandwich cookies instead of vanilla. You can also mix in cocoa powder into the filling for extra chocolatey goodness.
- Assembly: Layer the chocolate cookies with your cookie butter filling as you would with the original recipe.
- Topping: Consider a sprinkle of chocolate shavings or mini chocolate chips on top to impress guests at your next gathering.
This variation brings a whole new level of indulgence that chocolate lovers will adore!
Vegan Alternative Using Plant-Based Ingredients
For our friends following a vegan lifestyle, a cookie butter icebox cake can still be in your dessert repertoire! It’s easier than you might think. Here’s how to make it:
- Cookies: Choose vegan cookies; many brands offer delicious options that typically contain no animal products.
- Filling: Replace traditional cream cheese with a blended mix of soaked cashews (for creaminess) and coconut milk or a plant-based whipped topping. Sweeten with maple syrup for a natural sugar boost.
- Assembly: Just like the original, layer your vegan cookies with this filling.
This plant-based cookie butter icebox cake not only caters to dietary needs but is also an incredibly tasty alternative that everyone will enjoy!
For more tips on vegan baking, check out resources from the American Vegan Society. Making thoughtful swaps can make dessert just as enjoyable for everyone!
Baking Notes for Cookie Butter Icebox Cake
Tips for Achieving the Best Texture
Creating the perfect cookie butter icebox cake is all about balance. To achieve that creamy, melt-in-your-mouth texture, use high-quality whipped cream. Whip until soft peaks form; this will offer a light, airy consistency. Additionally, allow your cake to chill for at least 4–6 hours, or ideally overnight. This resting time helps the cookies soften and absorb some of the moisture, resulting in a dreamy, cohesive cake.
Common Pitfalls to Avoid
- Skipping the Chill: Don’t rush the chilling process! A well-chilled cake ensures all the flavors meld beautifully.
- Overmixing the Whipped Cream: It’s tempting to keep whipping, but stop once soft peaks form to maintain that fluffy texture.
- Using Stale Cookies: Fresh cookies will provide the best flavor and texture. Check your cookie stash before you start!
For further baking tips and tricks, check out resources like King Arthur Baking or Serious Eats. They offer fantastic insights into perfecting your cake-making skills!
Serving Suggestions for Cookie Butter Icebox Cake
Best Accompaniments for Serving
When it comes to serving your cookie butter icebox cake, there are a plethora of delightful options to elevate your dessert experience. Consider complementing the creamy layers of cookie butter with:
- Fresh Berries: Strawberries, blueberries, or raspberries add a refreshing burst of flavor and make for a vibrant color contrast.
- Whipped Cream: A dollop of rich whipped cream serves as a perfect indulgence to balance the sweetness.
- Chopped Nuts: Add crushed walnuts or pecans for some delightful crunch and a touch of nuttiness.
- Coffee or Herbal Tea: The pairing of a robust espresso or calming herbal tea can beautifully accentuate the cake’s rich flavors.
Creative Presentation Ideas
How you present your cookie butter icebox cake can make all the difference! Here are some fun ways to turn your dessert into a visual feast:
- Layered Jars: Serve individual portions in glass jars. Layer cookie butter, whipped cream, and cookie crumbles for a charming treat everyone can enjoy.
- Garnish with Chocolate Drizzle: A drizzle of melted chocolate over the top not only adds an enticing look but also enhances the overall taste.
- Mini Cakes: Create mini versions by using ramekins—perfect for those who love their own little sweet escape.
Pairing your cookie butter icebox cake with these suggestions will not only enhance its flavor but also create a memorable experience for everyone at the table. Want to learn more about creative desserts? Check out The Kitchn for more inspiration!
Time details for Cookie Butter Icebox Cake
Making the perfect cookie butter icebox cake is as much about timing as it is about the ingredients. Let’s break down the timing so you can plan your baking adventure!
Preparation time
You’ll spend about 20-30 minutes gathering your ingredients and assembling this delightful no-bake dessert. It’s a quick process, allowing you to get creative while having fun in the kitchen.
Inactive chilling time
Patience is key! After preparation, the cake needs to chill for at least 4 hours, but letting it sit overnight enhances the flavors and texture—if you can wait that long!
Total time
In total, you’re looking at approximately 4.5 hours to a full day. This recipe offers a great make-ahead option for your gatherings!
For more tips on desserts, check out Baker’s Journal for insightful articles and recipes.
Nutritional information for Cookie Butter Icebox Cake
When indulging in a delicious cookie butter icebox cake, it’s always good to know what you’re treating yourself to. Each serving typically contains:
Calories per serving
Roughly 300 calories per slice, making it a sweet treat without going overboard.
Breakdown of macronutrients
This delightful dessert isn’t just about taste; it also has a balanced macronutrient profile:
- Carbohydrates: Approximately 38g, providing energy and delight.
- Protein: About 3g, thanks to the creamy layers.
- Fat: Roughly 14g, primarily from the cookie butter and any added toppings.
For those mindful of their nutritional choices, cookie butter icebox cake can fit into a balanced diet when enjoyed in moderation. Want to dive deeper into healthy dessert ideas? Check out resources from the Academy of Nutrition and Dietetics for expert insights.
Remember, enjoying dessert is part of a balanced lifestyle, so feel free to savor that slice!
FAQs about Cookie Butter Icebox Cake
Can I make this cake dairy-free?
Absolutely! Transforming your cookie butter icebox cake into a dairy-free delight is easy. Simply swap out the cream cheese and heavy cream for dairy-free alternatives. Brands like Kite Hill offer great almond-based cream cheeses, and coconut whipped cream can add that luscious texture you love without the dairy. Always be sure to check labels for any hidden dairy ingredients.
How long can I store leftovers?
Leftovers? If you’re lucky enough to have any, you can store your cookie butter icebox cake in an airtight container in the refrigerator for up to 5 days. Just be mindful that the texture may change slightly as it sits. To keep things fresh, try to cover the top with plastic wrap to prevent it from absorbing any fridge odors.
What can I substitute for Lotus Biscoff cookies?
Those irresistible Lotus Biscoff cookies are key to your cookie butter icebox cake, but if you can’t find them, don’t worry! You can easily substitute them with graham crackers or ginger snaps. Both provide a delicious crunch and sweetness that complements the creamy layers and cookie butter perfectly.
If you want to get fancy, consider using other spiced cookies or even gluten-free options. The beauty of this recipe is its flexibility. So go ahead, experiment a little!
For more information on cookie substitution and ingredient alternatives, check out The Kitchn. Happy baking!
Conclusion on Cookie Butter Icebox Cake
Final thoughts on this delightful dessert
In summary, the cookie butter icebox cake is a game-changer for dessert lovers. It effortlessly combines layers of creamy bliss with the irresistible crunch of cookies, creating a dessert that’s as easy to make as it is delicious. Imagine sharing this delightful treat at your next gathering or indulging in it after a long day; it’s bound to impress.
Not only is this cake versatile, with many options for customization, but it also gives you a chance to experiment. Whether you prefer to add a fruit layer or a twist of chocolate, the possibilities are endless! So, why not give it a try? You might just discover your new favorite dessert! For more delicious dessert ideas, check out Taste of Home or Serious Eats for inspiration!
PrintCookie Butter Icebox Cake: The Best No-Bake Dessert Delight
Cookie Butter Icebox Cake is a delightful no-bake dessert perfect for any occasion. It features layers of creamy cookie butter, whipped cream, and crunchy cookies, making it a favorite treat among dessert lovers.
- Prep Time: 20 minutes
- Total Time: 4 hours 20 minutes
- Yield: 8 servings
- Category: Dessert
- Method: no-bake
- Cuisine: American
- Diet: Vegetarian
Ingredients
- 1 cup cookie butter
- 2 cups heavy whipping cream
- 1/2 cup powdered sugar
- 1 teaspoon vanilla extract
- 12 graham crackers
- 1/4 cup chocolate chips
Instructions
- In a mixing bowl, beat the heavy whipping cream until soft peaks form.
- Add powdered sugar and vanilla extract, and continue beating until stiff peaks form.
- In another bowl, stir cookie butter until smooth.
- Gently fold the cookie butter into the whipped cream until well combined.
- Layer graham crackers at the bottom of a serving dish.
- Spread a layer of the cookie butter mixture on top of the graham crackers.
- Repeat layers until all ingredients are used, finishing with the cookie butter mixture on top.
- Sprinkle chocolate chips over the top layer.
- Refrigerate for at least 4 hours before serving.
Notes
- For an extra crunch, add chopped nuts or crushed cookies between the layers.
- Make sure to let the cake chill properly for the best texture.
Nutrition
- Serving Size: 1 slice
- Calories: 350
- Sugar: 25g
- Sodium: 100mg
- Fat: 30g
- Saturated Fat: 18g
- Unsaturated Fat: 10g
- Trans Fat: 0g
- Carbohydrates: 30g
- Fiber: 1g
- Protein: 3g
- Cholesterol: 75mg