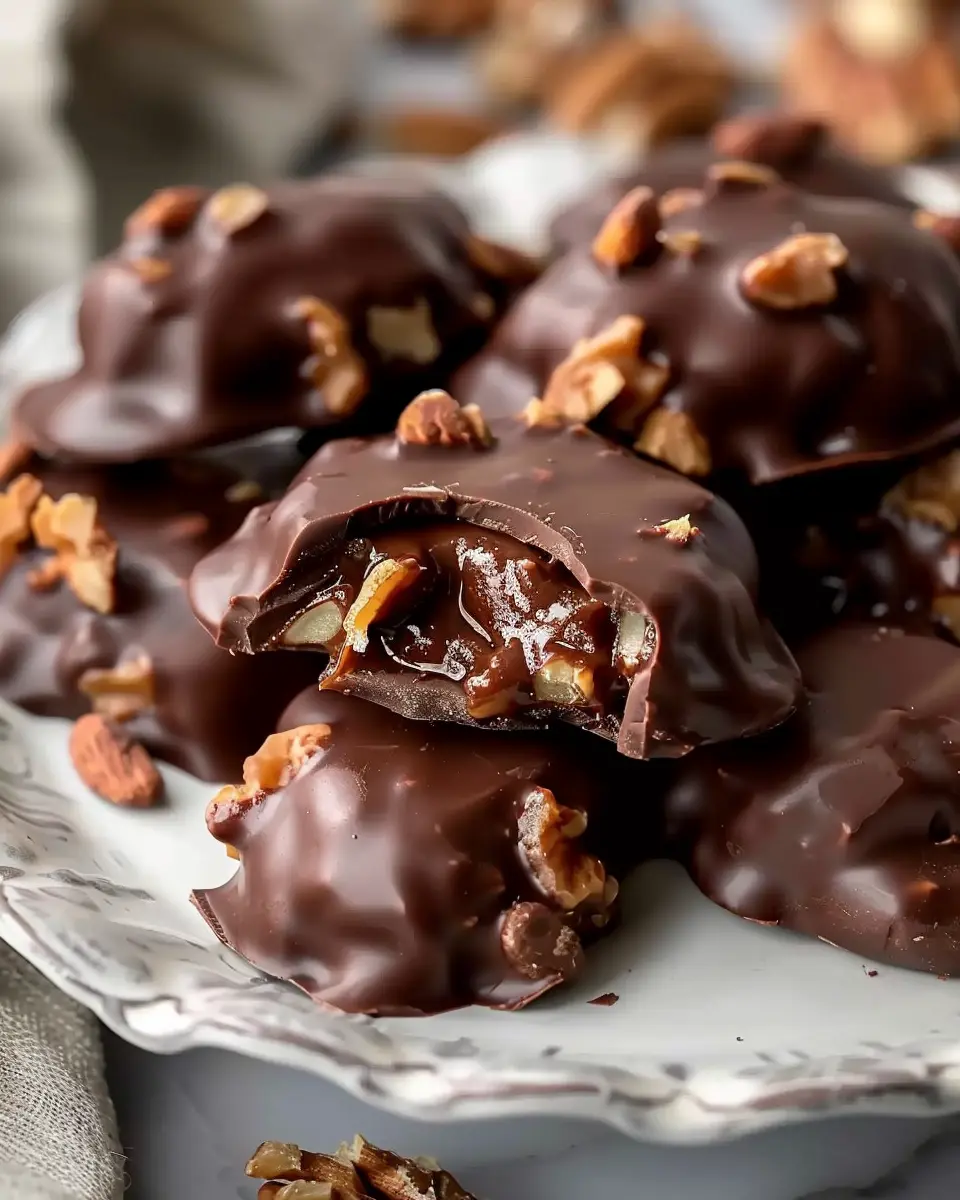
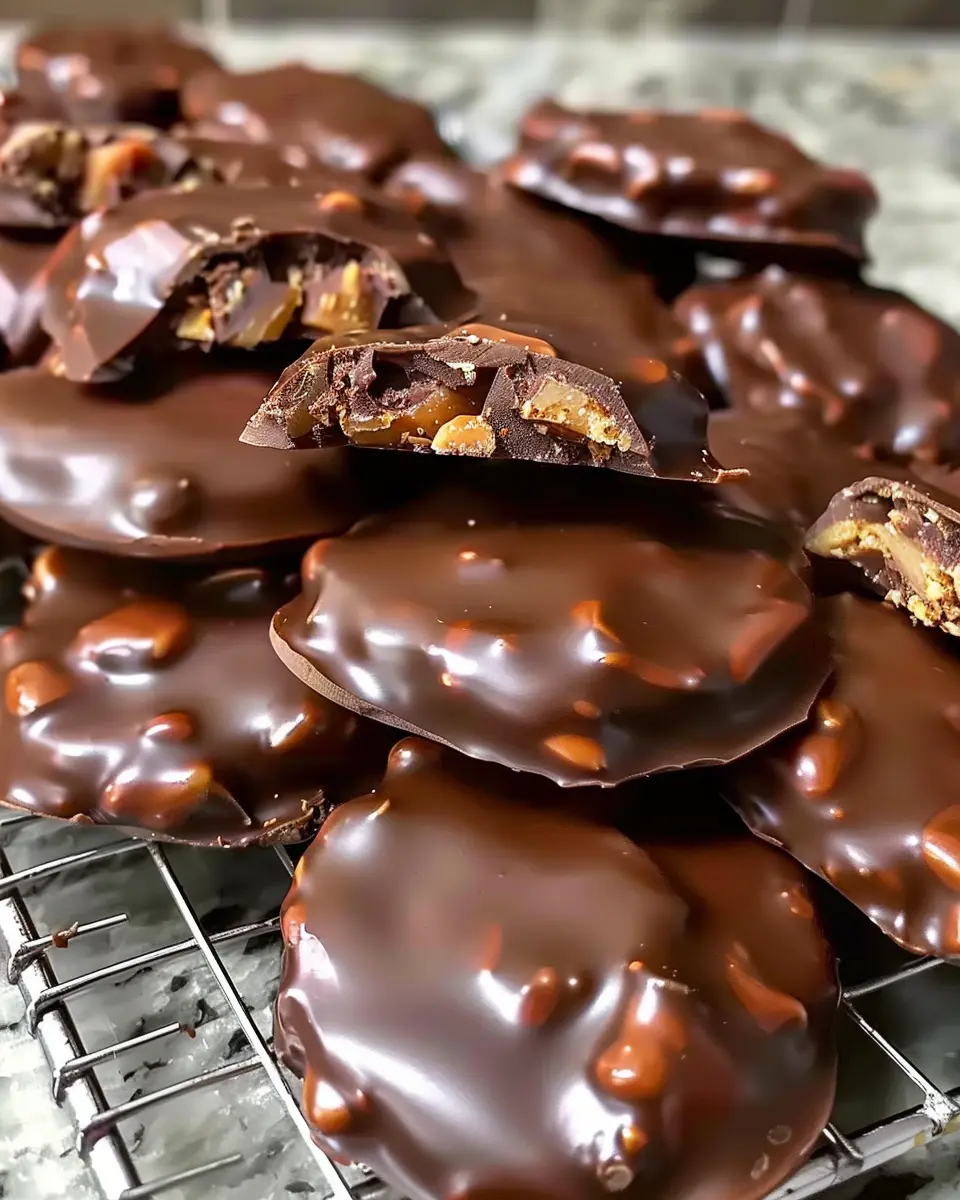
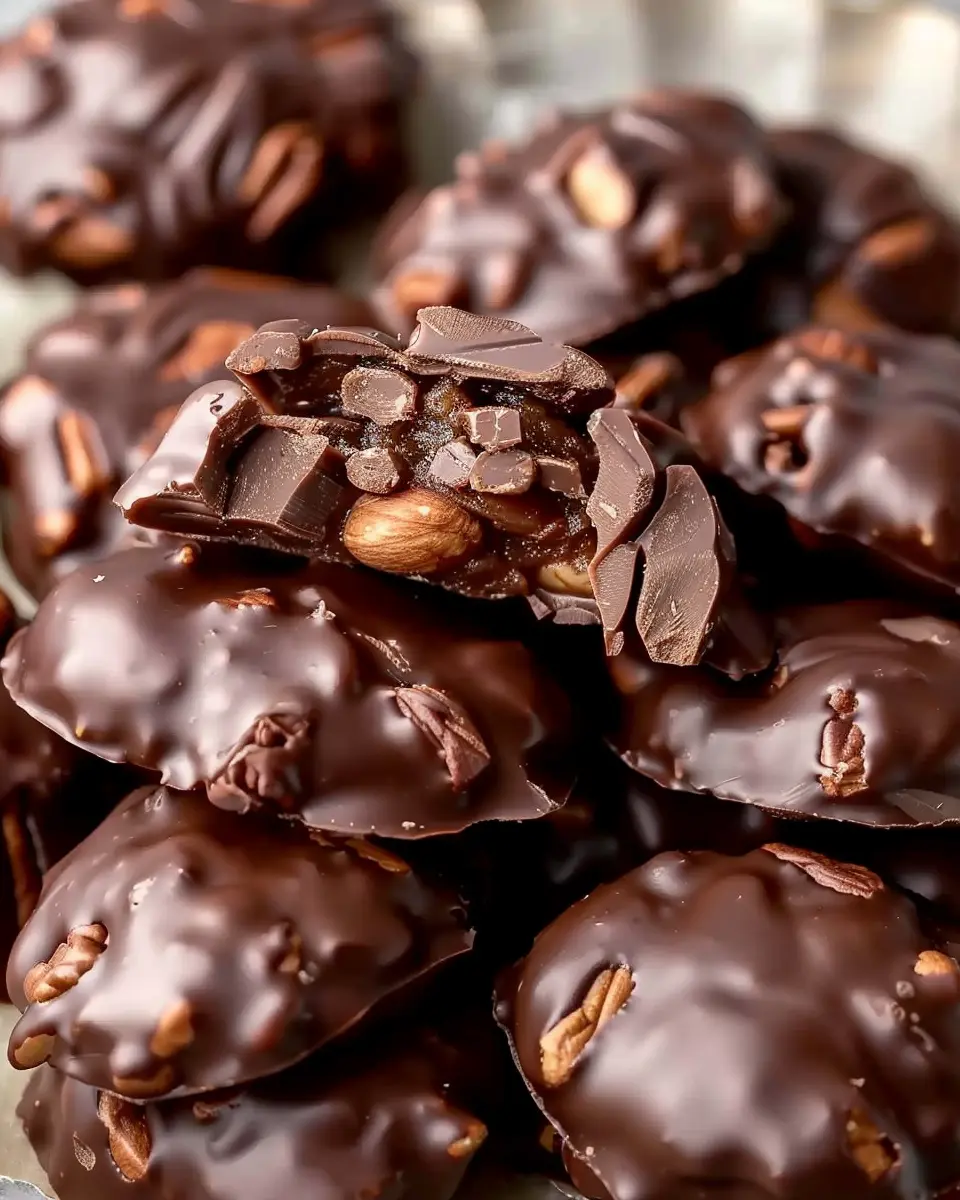
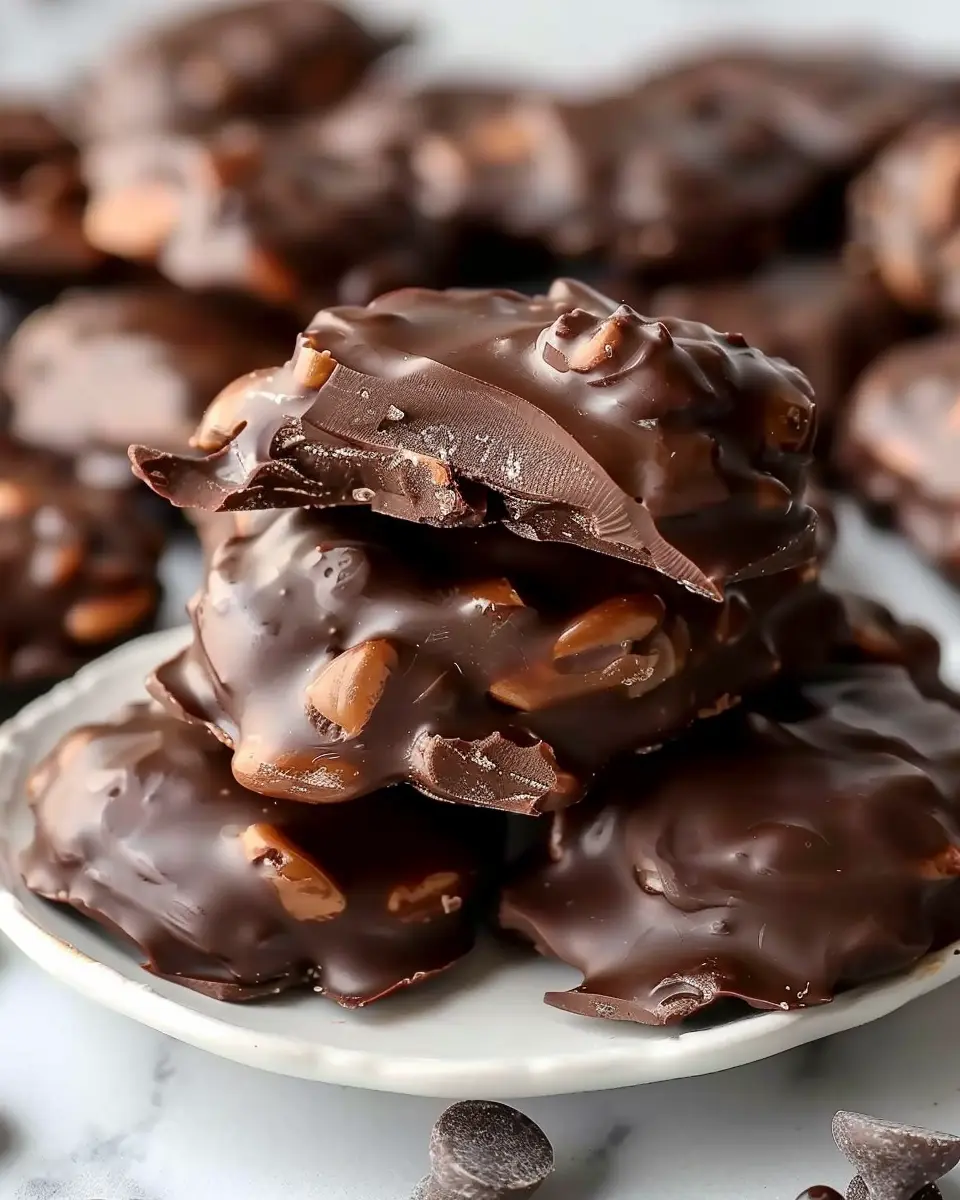
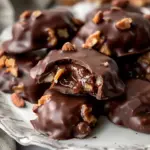
Introduction to Homemade Chocolate Turtles
Homemade chocolate turtles are a delightful treat that perfectly combines caramel, chocolate, and nuts into an irresistible bite-sized candy. These delicious confections are a perfect way to impress friends and family, making them an excellent choice for gifts, special occasions, or simply indulging yourself. But why should you make homemade chocolate turtles instead of buying them? Well, for one, the homemade version allows you to control the ingredients, ensuring you get the freshest flavors without any preservatives or artificial additives. Plus, there’s something quite rewarding about creating a delicious treat from scratch.
What Makes Homemade Chocolate Turtles Special?
Making your own chocolate turtles is a simple process that yields fantastic results. You’ll only need a few ingredients – caramel, chocolate, and nuts – making it an accessible project even for beginners. Here’s what makes them so special:
-
Personal Touch: When you create chocolate turtles at home, you can customize them to your liking. Whether you prefer pecans, walnuts, or even almonds, the choice is yours. You could even experiment by adding flavors like sea salt or a hint of espresso to the caramel.
-
Cost-Effective: Did you know that premade chocolate turtles can often be a bit pricey? By making your own, you can save money while creating a larger batch to share or enjoy over time.
-
Perfect for Any Occasion: Whether you’re hosting a party, heading to a holiday gathering, or simply want a sweet treat to enjoy, homemade chocolate turtles fit the occasion. They are easily packaged, making them great for gifts.
Moreover, studies show that creating food from scratch can help foster creativity and reduce stress, making cooking a therapeutic activity. So, as you embark on this chocolate adventure, remember that you’re not just making a sweet treat; you’re also enjoying the process.
Incorporating homemade chocolate turtles into your dessert routine can spark joy and become a cherished memory for you and your loved ones. So grab your apron, and let’s get started on this sweet journey! For additional tips and recipes, you can take a look at expert cooking sites like Food Network or Bon Appétit.
Ingredients for Homemade Chocolate Turtles
Essential ingredients for chocolate turtles
Creating homemade chocolate turtles is easier than you might think! You’ll want to gather a few essential ingredients that bring this delightful treat to life:
- Pecans: These rich, buttery nuts are the star of the show. Toasting them slightly enhances their flavor.
- Caramel: You can use store-bought caramel candies or make your own for a richer taste. This ooey-gooey layer is a must!
- Chocolate: Dark or milk chocolate works; it’s all about your preference. Melt it down to create a smooth coating.
Optional ingredients for added flavor
Why stop at basic when you can elevate your homemade chocolate turtles?
- Sea salt: A sprinkle of sea salt on top can really enhance the sweetness and create a delightful contrast.
- Vanilla extract: Adding a splash of pure vanilla to your caramel can deepen the flavor profile.
- Dark chocolate drizzle: For an extra touch, drizzle melted dark chocolate over the finished turtles for a gourmet look.
Feel free to experiment with these ingredients. After all, the best recipes often come from personal touches! For more tips on caramel techniques, check out Serious Eats.
Preparing Homemade Chocolate Turtles
If you’re looking for a sweet and nutty indulgence to impress friends or simply enjoy during a cozy night in, homemade chocolate turtles are the perfect treat! This delightful combination of pecans, caramel, and chocolate is satisfying to make and even more satisfying to eat. Ready to dive in? Let’s break it down step by step.
Preheat your oven and toast pecans
Every great recipe begins with a proper start, and toasting your pecans is no exception! Preheat your oven to 350°F (175°C). This little step enhances the flavor of your nuts and adds a delightful crunch to your homemade chocolate turtles.
- Spread the pecans on a baking sheet in a single layer.
- Toast them in the oven for about 8-10 minutes, or until they’re golden brown. Keep an eye on them; nuts can go from perfectly toasted to burnt in a blink!
Don’t underestimate the power of freshly toasted nuts. This simple act elevates your turtles and fills your kitchen with an irresistible aroma!
Prepare your baking sheet
While your pecans are toasting, it’s time to prepare your baking surface. Grab a baking sheet and line it with parchment paper. Using parchment prevents your homemade chocolate turtles from sticking and makes cleanup a breeze.
- Make sure the parchment paper hangs over the edges a bit; this will allow for easy lifting of the turtles once they’re set.
Taking these extra steps will save you headaches later—trust me; no one wants a turtle stuck to the pan!
Make the caramel mixture
Now, let’s get to the sticky goodness that makes turtles so special—caramel! In a saucepan over medium heat, combine:
- 1 cup of granulated sugar
- 6 tablespoons of unsalted butter
- 1/4 cup of heavy cream
- A pinch of salt
Stir continuously until the sugar dissolves and the mixture bubbles gently. Keep a close eye on the heat; if it gets too hot, the caramel can burn quickly! Once the mixture reaches a beautiful amber color—around 5-7 minutes—remove it from the heat.
Pro tip: If you’re nervous about making caramel, check out some resources on caramelization to give yourself extra confidence before tackling this step.
Form your turtle shapes
Once your caramel is ready, it’s time to assemble your homemade chocolate turtles.
- Place clusters of toasted pecans on the prepared baking sheet—about three pecans per turtle should do.
- Carefully spoon the warm caramel over each pecan cluster, making sure it’s well-coated. Don’t worry about perfect shapes; the rustic look adds charm!
Let them cool for about 30 minutes, or until the caramel has set slightly but is still pliable.
Melt the chocolate for dipping
While the turtles are cooling, prepare the chocolate coating. You can use either dark or milk chocolate, depending on your preference.
- Chop 8 ounces of chocolate into small pieces for even melting.
- Set up a double boiler by placing the chocolate in a bowl over simmering water (or microwave it in short bursts at 30-second intervals). Stir until completely melted and smooth.
What’s your chocolate of choice? Dark chocolate pairs beautifully with the sweetness of the caramel, while milk chocolate offers a classic twist.
Dip and set your chocolate turtles
Finally, the moment you’ve been waiting for! Take each caramel turtle and gently dip it into the melted chocolate, making sure to coat it fully.
- Allow any excess chocolate to drip off before placing it back on the parchment-lined baking sheet.
- Repeat until you’ve dipped all your turtles!
Let them set at room temperature or pop them in the fridge for quicker results.
That’s it! In just a few easy steps, you’ve made your very own homemade chocolate turtles. They’re perfect for gifting or just enjoying yourself—be prepared to share; once you start, they’ll vanish quickly! For expert tips and inspiration, check out this how to make caramel guide. Happy cooking!
Variations on Homemade Chocolate Turtles
When it comes to homemade chocolate turtles, the classic combination of chocolate, caramel, and nuts is simply irresistible. However, you can easily switch things up to suit your taste preferences or dietary needs. Let’s explore two delightful variations!
Chocolate Turtles with Dark Chocolate
If you’re a dark chocolate lover, you’re in for a treat! Switching from milk to dark chocolate can not only enhance the flavor profile but also introduce a rich, bittersweet element that perfectly balances the sweetness of the caramel. To make these:
- Use a high-quality dark chocolate (60-70% cocoa).
- Prepare the rest of your turtle recipe as usual, but just dip each filled nut cluster in melted dark chocolate instead of milk chocolate.
Dark chocolate is rich in antioxidants and has health benefits, which makes this version feel a little indulgent yet guilt-free!
Vegan Chocolate Turtles
For those following a vegan lifestyle, creating homemade chocolate turtles that fit your dietary needs is simpler than you think. All it takes is a few substitutions:
- Caramel: Opt for a mixture of dates and coconut cream to create a creamy base. It’s sweet and just as luxurious as traditional caramel.
- Chocolate: Choose vegan chocolate chips or baking chocolate. The brands like Enjoy Life or Hu Chocolate offer delicious dairy-free options.
- Nuts: Stick with your favorites, but ensure they’re also ethically sourced for a more wholesome treat.
These vegan turtles are just as satisfying, proving that you can enjoy your sweet cravings without compromising your values!
With these variations, your homemade chocolate turtles can be a personalized treat for everyone in your circle. Try them out, and who knows? You might just inspire a chocolate revolution among your friends!
Cooking Tips and Notes for Homemade Chocolate Turtles
Tips for a Smoother Caramel
Creating homemade chocolate turtles is all about that delicious caramel layer. To achieve a smoother consistency, consider these strategies:
- Use a heavy-bottomed saucepan: It helps distribute heat evenly, reducing the risk of burning.
- Control your heat: Cook the sugar mixture on low to medium heat and avoid stirring until it starts to bubble. This prevents crystal formation.
- Add a splash of cream: When your caramel reaches the right color, take it off the heat and stir in warm cream slowly. This will soften and smoothen the texture.
For a deeper dive into caramel science, check out this comprehensive guide from Serious Eats.
Common Mistakes to Avoid
Here are some pitfalls to steer clear of when making your homemade chocolate turtles:
- Skipping the candy thermometer: Precision matters! It’s best to aim for 240°F (soft ball stage) for that perfect chewy caramel.
- Not letting the chocolate set: After dipping, allow your turtles to rest until the chocolate has completely hardened. Patience is key!
Have you ever had a batch of chocolate turtles go awry? Don’t worry, we’ve all been there! Just remember these tips, and your next batch will be a hit. Enjoy the caramel-making journey and happy cooking!
Serving suggestions for Homemade Chocolate Turtles
Creative ways to present your turtles
When it comes to serving your homemade chocolate turtles, presentation can elevate the experience. Consider these fun ideas:
- Gift Boxes: Arrange your turtles in a decorative box tied with a ribbon for a delightful homemade gift.
- Dessert Platter: Create an eye-catching platter by mixing your turtles with fresh fruits like strawberries or apples for a visual pop.
- Cups: Serve individual turtles in cupcake liners for a charming touch at parties or gatherings.
Pairing suggestions for enhanced flavor
To enhance the deliciousness of your homemade chocolate turtles, think about some charming pairings:
- Fresh Fruits: The sweetness of fresh pears or apples contrasts beautifully with the rich chocolate.
- Coffee or Tea: Enjoy them with a smooth cup of espresso or herbal tea, which complements the chocolate and nutty flavors.
- Nuts: Pairing with lightly salted nuts can add a savory crunch, balancing the sweetness perfectly.
These little touches can make your homemade chocolate turtles not just a treat but a memorable experience! For more creative serving suggestions, check out this culinary guide for inspiration.
Time Breakdown for Homemade Chocolate Turtles
Preparation Time
Getting started on your homemade chocolate turtles doesn’t take long! You’ll need about 15 minutes to gather your ingredients, prepare your work area, and prep your nuts and caramel. It’s a great way to jump into the kitchen after a busy day and unleash your inner chocolatier.
Cooking Time
The cooking part is quick too. You’ll spend around 10–15 minutes melting the chocolate and caramel, plus a few moments to assemble everything. Trust me; this time flies by, especially when the enticing aroma fills your kitchen!
Total Time
When combined, you’re looking at a total of about 30–35 minutes from start to finish. Not bad for such a delightful treat! Whether you’re preparing for a gathering or indulging in a sweet evening snack, these homemade chocolate turtles are well worth the short wait. For tips on how to store your treats, check out this guide from Food Network.
So, are you ready to impress your friends with these delicious bites? Let’s dive into the recipe!
Nutritional Facts for Homemade Chocolate Turtles
When indulging in homemade chocolate turtles, it’s good to be mindful of the nutrition they provide. Here’s a quick breakdown to help you enjoy these delightful treats in moderation.
Calories per turtle
Each turtle comes in around 100-120 calories, depending on the ingredients used and portion sizes. If you’re watching your calorie intake, a simple tweak in the recipe can help keep those numbers in check without sacrificing flavor.
Carbs and sugars
These delicious candies contain about 10-15 grams of carbohydrates per turtle, predominantly from sugar. If you’re aiming to reduce sugar in your diet, consider swapping out some sweeteners for natural alternatives like stevia or erythritol.
Fats and proteins
The combination of nuts and chocolate offers healthy fats, with each turtle packing around 5-7 grams of fat, alongside 1-2 grams of protein. Nuts, like pecans or walnuts, not only add flavor but also contribute heart-healthy nutrients.
For more in-depth nutritional information, check resources like the USDA’s FoodData Central. Remember, balance is essential in any diet, so enjoy your homemade chocolate turtles as a special treat!
FAQs about Homemade Chocolate Turtles
When it comes to crafting your own delicious homemade chocolate turtles, you might have a few questions. Let’s address some common FAQs to help you navigate this delightful treat!
How long can I store my chocolate turtles?
Once you’ve perfected your homemade chocolate turtles, you’ll want to savor your creation for as long as possible! Generally, these tasty morsels can be stored in an airtight container at room temperature for about 1 to 2 weeks. If you need to keep them longer, consider refrigerating them to extend their shelf life up to a month. Just be sure to let them come to room temperature before enjoying, as this will enhance their flavor!
Can I use different nuts for chocolate turtles?
Absolutely! While pecans are the classic choice for homemade chocolate turtles, feel free to experiment with various nuts. Almonds, cashews, or even hazelnuts can give your turtles a unique twist. Just keep in mind that different nuts might offer different textures and flavors, so choose according to your personal taste!
What chocolate works best for dipping?
For dipping your turtles, high-quality chocolate is key. Dark chocolate, milk chocolate, or even white chocolate can work wonders depending on your preference. Look for chocolate with a cocoa content of at least 60% for dark chocolate to ensure a rich flavor. Brands like Ghirardelli or Guittard are reputable choices that melt beautifully. For a delightful experience, consider mixing different types of chocolate or adding a touch of sea salt on top to elevate the taste!
Incorporate these tips, and you’ll have everyone asking for more of your scrumptious homemade chocolate turtles. Happy snacking!
Conclusion on Homemade Chocolate Turtles
Why you should try making chocolate turtles at home
Making homemade chocolate turtles is not just a tasty venture; it’s a delightful way to engage your culinary skills and impress your friends. By crafting these sweet treats, you can customize flavors and adjust ingredients to your liking, creating a personal touch that store-bought options simply can’t match.
Imagine the joy of combining creamy caramel, crunchy nuts, and smooth chocolate right in your kitchen! Plus, it’s a fantastic weekend project or a fun activity to share with loved ones. So gather your ingredients, explore new flavors, and enjoy the satisfaction of making delicious chocolate turtles that everyone will adore. For more ideas on sweet treats, check out this guide on chocolate recipes.
PrintHomemade Chocolate Turtles: Indulge in This Easy Treat Recipe
Enjoy a delightful and simple recipe for homemade chocolate turtles, a perfect treat for any occasion.
- Prep Time: 30 minutes
- Cook Time: 10 minutes
- Total Time: 40 minutes
- Yield: 12 servings
- Category: Dessert
- Method: No-Bake
- Cuisine: American
- Diet: Gluten-Free
Ingredients
- 2 cups pecan halves
- 1 cup caramel candies
- 1 cup chocolate chips
- 2 tablespoons heavy cream
Instructions
- Preheat the oven to 350°F (175°C) and spread the pecans on a baking sheet.
- Toast the pecans for about 10 minutes, stirring occasionally, until golden brown.
- In a saucepan, melt the caramel candies with heavy cream over low heat until smooth.
- On a baking sheet lined with parchment paper, form clusters of pecans and pour melted caramel over them.
- Let the caramel cool, then melt the chocolate chips and drizzle over the caramel clusters.
- Allow the chocolate to set before serving.
Notes
- Store turtles in an airtight container at room temperature.
- They can also be refrigerated for a firmer chocolate texture.
Nutrition
- Serving Size: 2 pieces
- Calories: 250
- Sugar: 22g
- Sodium: 50mg
- Fat: 15g
- Saturated Fat: 5g
- Unsaturated Fat: 10g
- Trans Fat: 0g
- Carbohydrates: 30g
- Fiber: 2g
- Protein: 3g
- Cholesterol: 10mg