
Introduction to Christmas Cherry Bars
Christmas is a magical time of year, brimming with twinkling lights, warm gatherings, and, of course, delightful treats. Among the array of festive desserts, Christmas Cherry Bars stand out as a perfect blend of flavor and nostalgia. But why exactly are these bars a must-have for your holiday festivities?
Why Christmas Cherry Bars are the Perfect Holiday Treat
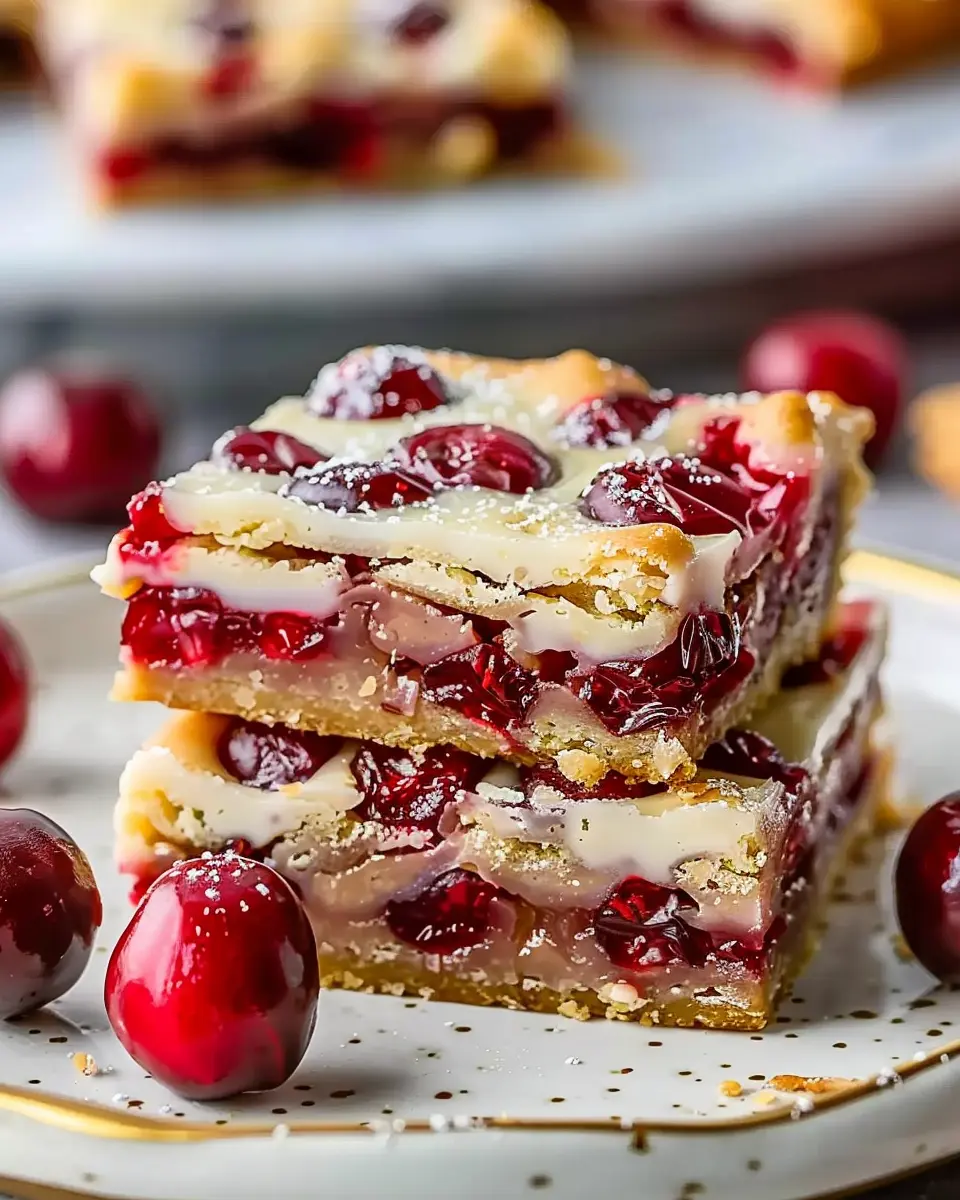
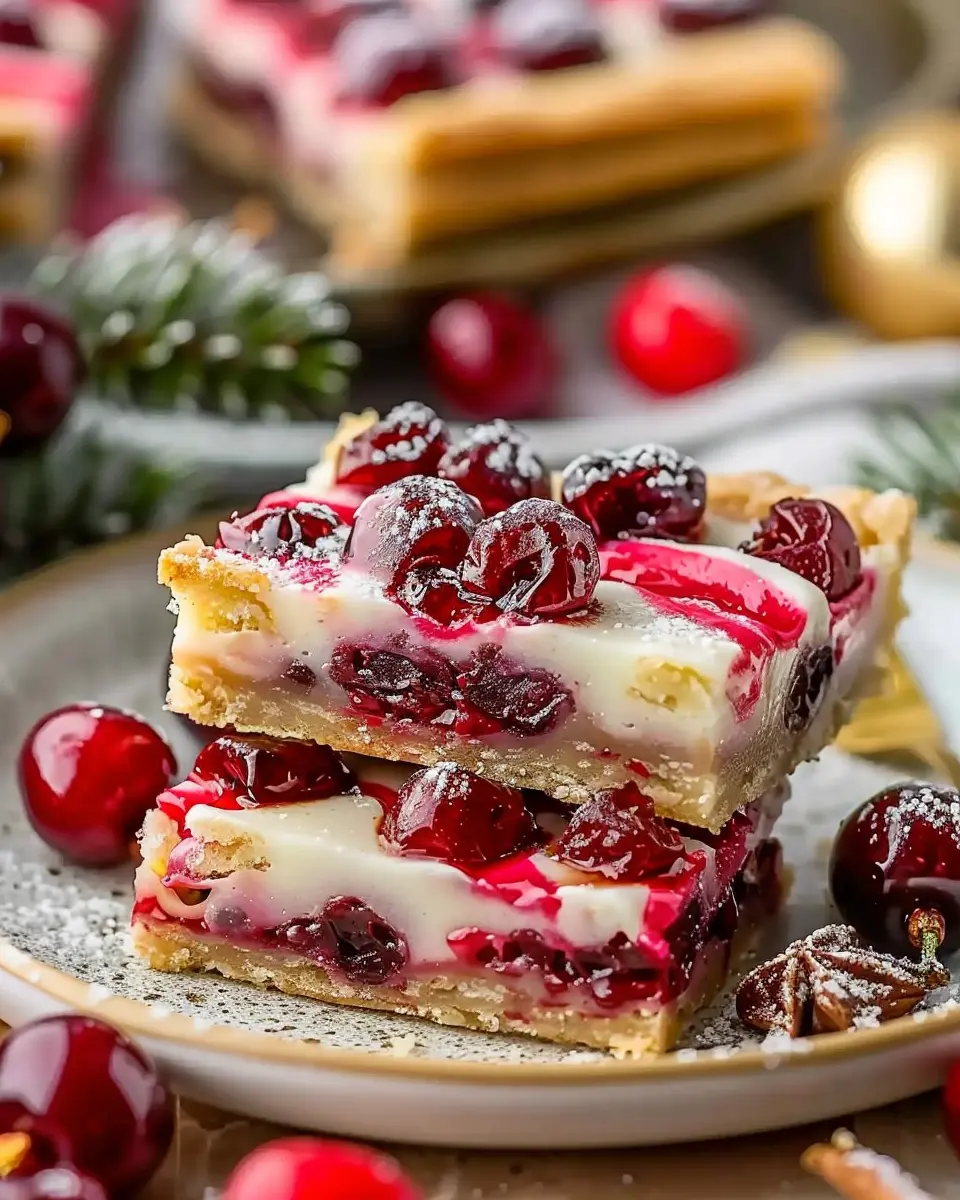
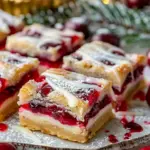
From their rich, chewy texture to the bright burst of cherry flavor, Christmas Cherry Bars have an enchanting way of capturing the essence of the season. Imagine setting out a plate of these delightful bars for friends and family, the ruby-red cherries winking back at you, inviting everyone to take a bite. They’re not just visually appealing; the combination of tart cherries and buttery base is a taste sensation that is bound to impress.
What sets Christmas Cherry Bars apart is their versatility. They can serve as a sweet ending to a holiday meal or as a grab-and-go treat during those busy shopping days. Plus, they’re easy to make in large batches, which is a game changer when you have unexpected guests or a cookie swap event.
Furthermore, the recipe can be adapted for various dietary preferences. Whether you’re looking to make a gluten-free version or want to swap in some healthier sweeteners, the possibilities are endless. If you’re interested in exploring more about gluten-free baking, check out resources from Gluten-Free Society.
Another captivating element? The cherished memories that come flooding back with each bite. Many people have fond recollections of baking together with family during the holidays, and this recipe can easily become part of those traditions. It’s heartwarming to know that with every pan of Christmas Cherry Bars you bake, you’re not just creating a dessert, but also crafting moments that will last a lifetime.
So, as you prepare for this festive season, consider adding Christmas Cherry Bars to your dessert table. They are quick, easy, and packed with holiday cheer. With each bar, you fold in love, tradition, and joy—truly the perfect treat for celebrating with loved ones. As you dive into this recipe, remember: baking is as much about bringing people together as it is about the delightful outcomes. Happy baking!
Ingredients for Christmas Cherry Bars
When preparing to delight your friends and family with Christmas Cherry Bars, it’s essential to start with the right ingredients. Here’s what you’ll need to whip up a batch that’s sure to impress:
- 2 cups of all-purpose flour: The backbone of your bars, providing structure and a chewy texture.
- 1 cup of granulated sugar: Sweetness is critical, and sugar brings balance to the tart cherries.
- 1/2 cup of butter, softened: For that rich, buttery flavor and tender crumb.
- 2 large eggs: These bind everything together and add moisture.
- 1 teaspoon of vanilla extract: A touch of vanilla elevates the flavor profile beautifully.
- 1 can (21 ounces) cherry pie filling: The star of our Christmas Cherry Bars, adding both sweetness and a festive hue.
- 1/4 teaspoon of salt: Balances the sweetness and enhances flavors.
- 1 teaspoon of baking powder: Helps your bars rise perfectly.
As you gather these ingredients, consider checking out some great tips on ingredient substitutions at The Spruce Eats for even more kitchen inspiration! With just a few simple elements, you’re well on your way to creating a delightful holiday treat that everyone will love.
Step-by-Step Preparation of Christmas Cherry Bars
Get ready to fill your kitchen with the wonderful aroma of holiday baking as we dive into the delightful world of Christmas Cherry Bars. This scrumptious treat is perfect for your holiday gatherings, and I’ll walk you through each step to ensure your bars come out just right. So, let’s roll up those sleeves and get started!
Preheat and Prepare Your Baking Pan
Before you mix your ingredients, it’s essential to get your oven preheating to a cozy 350°F (175°C). Take this downtime to prep your baking pan. A 9×13 inch pan works wonders for this recipe. Grease it lightly with cooking spray or butter, or you can line it with parchment paper for easy removal. This preparation is crucial; nobody wants their delicious Christmas Cherry Bars to stick!
Mix Dry Ingredients
In a large mixing bowl, combine the dry ingredients:
- 2 cups of all-purpose flour
- 1 cup of granulated sugar
- 1 teaspoon of baking powder
- ½ teaspoon of salt
Whisk them together until they’re perfectly blended. This mixing ensures that the baking powder and salt distribute evenly throughout the bars, giving them the perfect rise and flavor.
Incorporate the Butter
Now it’s time to add the butter. You’ll need 1 stick of unsalted butter, softened to room temperature. Using a pastry cutter or your hands, blend the butter into the dry ingredients until the mixture resembles coarse crumbs. This is the part where you really get to connect with your ingredients—nothing beats the feeling of classic baking!
Form the Dough
Once your mixture is crumbly, it’s time to form the dough. Add 1 teaspoon of vanilla extract and 1 egg to the bowl. Blend these wet ingredients into your dough until just combined. At this point, it should be soft but not overly sticky. If it feels too wet, sprinkle in a bit more flour.
Prepare the Base
Take about two-thirds of your dough and press it into the bottom of your prepared baking pan. This will be the base of your Christmas Cherry Bars. It doesn’t need to be perfect; just ensure it’s evenly spread to provide a sturdy layer for your filling.
Add the Cherry and Chocolate Filling
Now comes the exciting part! Pour a jar of cherry filling evenly over the crust; you can use about 2 cups of your favorite brand. For an extra touch of decadence, sprinkle some semi-sweet chocolate chips (around 1 cup) on top of the cherries. The combination of sweet cherries and rich chocolate is a match made in holiday heaven!
Crumble the Reserved Dough
Take the remaining dough that you set aside earlier and crumble it over the cherry and chocolate layer. This adds texture and creates a beautiful, golden-brown topping as it bakes. Don’t worry if it looks uneven—this rustic charm adds to the homemade vibe of your Christmas Cherry Bars.
Bake and Cool
Slide your pan into the preheated oven and bake for about 30-35 minutes. You’ll know they’re done when the top is lightly golden and a toothpick comes out clean when inserted into the center. Once out of the oven, let them cool in the pan for about 15-20 minutes. This cooling period is crucial because it allows the bars to set, making them easier to cut.
Now, you have irresistible Christmas Cherry Bars ready to be sliced and served! Whether you’re sharing them at a holiday party or enjoying them with coffee at home, they’re sure to be a festive favorite. Don’t forget to check out this helpful guide on holiday baking tips to elevate your skills even further!
Enjoy your baking adventure this holiday season!
Variations on Christmas Cherry Bars
When it comes to Christmas Cherry Bars, the classic recipe is always a hit, but why not shake things up a little? Here are two delicious variations that will have your friends and family raving about your holiday baking skills.
Cherry Almond Variation
For a delightful twist, try adding almond flavors to your Christmas Cherry Bars. Simply incorporate almond extract into the batter along with the cherry filling. This variation not only enhances the aroma but adds a nutty depth that complements the cherries beautifully.
- Ingredients to Add:
- 1 teaspoon of almond extract
- Sliced almonds for topping
Bake as usual, and once cooled, sprinkle with sliced almonds for a crunchy topping. You can find more tips on incorporating almond flavors into your baking in this great article.
Dark Chocolate Twist
If you’re a chocolate lover, this variation is perfect for you! The combination of dark chocolate and cherries is a match made in heaven. Instead of a standard cherry topping, mix in dark chocolate chunks or chips into your Christmas Cherry Bars.
- Ingredients to Add:
- 1 cup of dark chocolate chips
- Optional: Drizzle melted dark chocolate on top after baking
This addition not only upgrades the flavor profile but also makes your bars look decadent. For more fun ideas on incorporating chocolate into recipes, check out this resource.
With these variations, your Christmas Cherry Bars will be the talk of your holiday gatherings. Which one will you try first? Happy baking!
Baking Tips for Christmas Cherry Bars
Baking Christmas cherry bars is a delightful way to celebrate the festive season. Here are some essential tips that will elevate your baking experience:
Choose Quality Ingredients
Using high-quality ingredients can make a noticeable difference. Opt for fresh cherries or premium cherry preserves. If you’re feeling adventurous, consider adding a splash of almond extract to enhance the cherry flavor.
Perfect Your Dough
Achieving the right consistency for your dough is crucial. It should be soft yet firm enough to hold its shape. If the dough feels too sticky, don’t hesitate to sprinkle a bit of flour as needed.
Ideal Baking Time
Keep a close eye on your bars as they bake. Start checking for doneness a few minutes before the recommended time. They should be golden brown on top and slightly firm to the touch.
Cool Before Cutting
Allow your bars to cool completely before cutting them. This will ensure clean, crisp edges and help maintain their shape. A good tip is to refrigerate them for an hour post-baking for the best results.
For more detailed baking techniques, check out resources like King Arthur Baking or Serious Eats. Happy baking!
Serving Suggestions for Christmas Cherry Bars
When it comes to delighting your guests during the festive season, Christmas Cherry Bars offer a sweet touch that’s hard to resist. Here are some creative serving suggestions to elevate this seasonal treat.
Pairing Options
- Whipped Cream: A dollop of freshly whipped cream adds a luxurious texture that balances the fruity tartness of the cherries. You can sweeten it a bit for an extra treat!
- Ice Cream: Serve your bars warm with a scoop of vanilla or nutmeg ice cream for a comforting dessert that feels like a hug on a plate. The combination of warm and cold is simply divine.
- Coffee or Hot Cocoa: Complement the festive flavors with a cup of rich coffee or creamy hot cocoa. It’s an inviting pairing that brings warmth to any holiday gathering.
Presentation Tips
- Individual Portions: Cut the cherry bars into small squares to make them easy to serve and enjoy at holiday parties. You could even put them in festive cupcake liners for a pop of color!
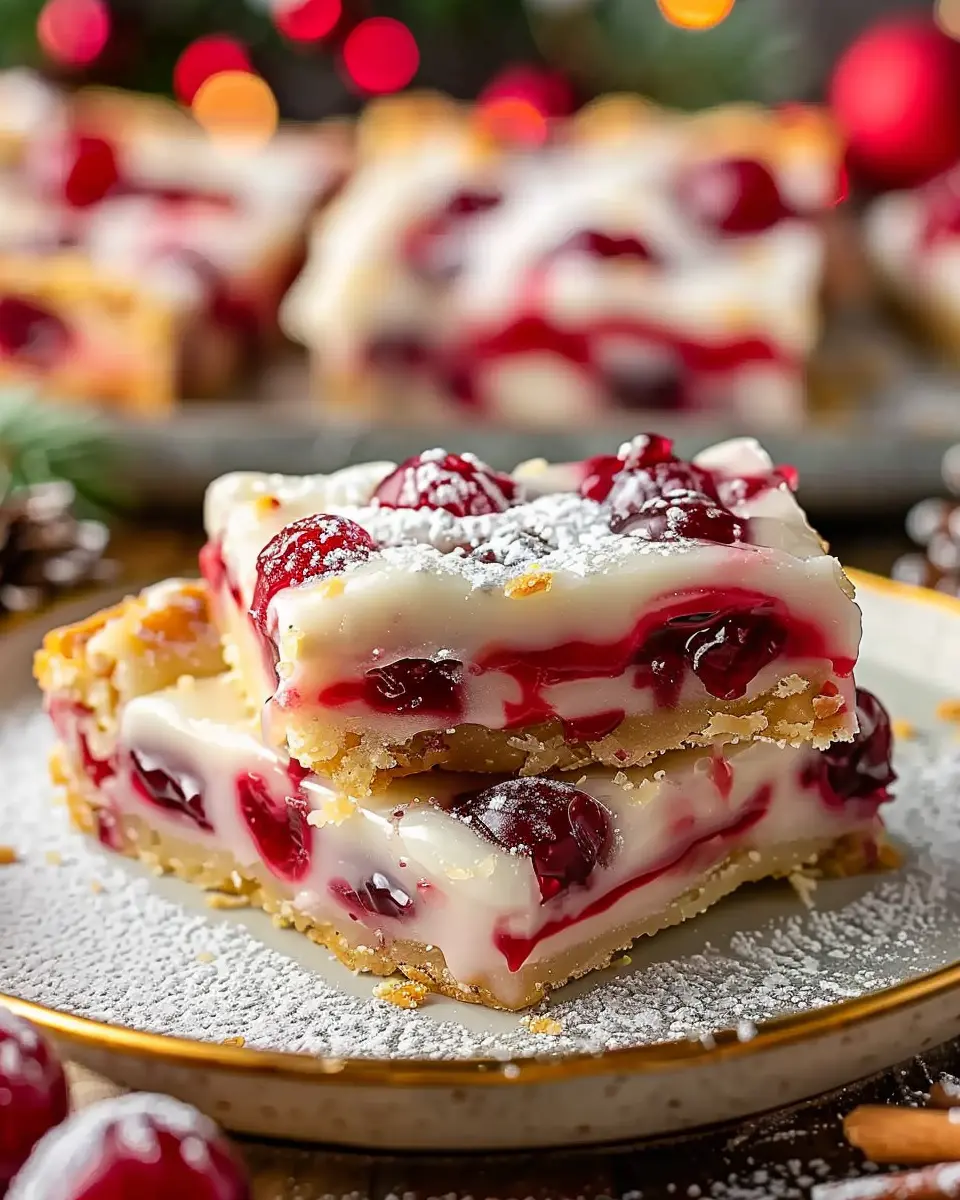
- Garnish: For an elegant touch, sprinkle some powdered sugar on top or add fresh mint leaves to brighten the dish. This little detail can make your dessert table look absolutely stunning.
Final Thoughts
There’s no wrong way to enjoy Christmas Cherry Bars. Perhaps you could try experimenting with different toppings or serving options to make it uniquely yours. The joy of sharing these delicious treats with friends and family is really what the holiday spirit is all about. For more ideas, consider visiting The Spruce Eats for additional dessert suggestions!
Time Breakdown for Christmas Cherry Bars
Preparation Time
Getting your Christmas Cherry Bars started is all about setting the right pace. You’ll need about 15-20 minutes to gather your ingredients and prepare your baking dish. This step is crucial, especially if you want to enjoy the festive aroma wafting through your kitchen while you bake!
Baking Time
Once your cherry bars are ready to go into the oven, expect them to bake for 25-30 minutes. The magic happens here as they transform into those delightful bars, golden and oozing with cherry goodness. Keep an eye on them as they bake!
Total Time
All in all, your Christmas Cherry Bars will take about 40-50 minutes from start to finish, including prep and baking. This makes them a quick, perfect treat to whip up during the hustle and bustle of the holiday season! For more baking tips, you might want to check out thekitchn.com for expert advice.
Nutritional Facts for Christmas Cherry Bars
When you indulge in Christmas Cherry Bars, it’s good to know what nutritional benefits and considerations they bring.
Calories
On average, one serving of these delightful bars contains around 200-250 calories. It’s a treat that can be enjoyed, especially during the festive season!
Sugars
These bars are often sweetened with cherries and sugar, contributing approximately 15-20 grams of sugar per serving. For those keeping a close eye on their sugar intake, consider using natural sweeteners or reducing the sugar content for a healthier twist.
Fats
The fat content ranges from 8-12 grams, depending on the ingredients used. If you’re looking to lower this number, try substituting butter with healthier alternatives like coconut oil or applesauce.
Christmas Cherry Bars can be a delicious addition to your holiday spread, balancing festive flavors while keeping nutritional awareness in mind. For more information on healthy baking substitutes, check out Healthline.
Embrace the festive spirit while being mindful of your wellness!
FAQs about Christmas Cherry Bars
Can I use fresh cherries instead of dried ones?
Absolutely! If you have fresh cherries on hand, feel free to swap them in. Just be sure to pit and chop them into small pieces, as this will help them blend nicely into the Christmas Cherry Bars. Keep in mind that fresh cherries may have a higher moisture content than dried ones. You might want to reduce other liquids in the recipe slightly or bake the bars a bit longer to ensure they set properly.
How should I store the Christmas Cherry Bars?
To keep your Christmas Cherry Bars fresh and delicious, store them in an airtight container at room temperature for up to a week. For longer shelf life, refrigerate them, where they can last about two weeks. If you prefer to freeze them, wrap individual bars in plastic wrap and place them in a freezer-safe bag. They will stay tasty for about three months—perfect for making ahead and enjoying later!
Can I make these bars in advance for a holiday party?
Definitely! In fact, making Christmas Cherry Bars ahead of time is a smart move. You can prepare them two to three days before your holiday party. This allows the flavors to meld beautifully, making them even tastier. When you’re ready to serve, just cut them into squares and place them on a festive platter. Your guests will love indulging in these delightful treats! For more tips on making holiday treats in advance, check out this helpful guide.
Feel free to reach out if you have more questions or need further assistance! Your holiday baking will be a hit!
Conclusion on Christmas Cherry Bars
In conclusion, Christmas Cherry Bars are the perfect blend of festive cheer and mouthwatering flavors. These delightful treats not only satisfy your sweet tooth but also make for an excellent addition to your holiday gatherings. When served, they offer a colorful, indulgent experience that can brighten anyone’s day.
Remember, you can easily customize the recipe with your favorite nuts or toppings for a personal touch. For more inspiration, check out expert sources like Food Network for variations. With this recipe in your arsenal, your holiday baking will surely impress family and friends alike! Enjoy the warmth and joy that comes from sharing these delightful bars.
PrintChristmas Cherry Bars: Easy Festive Treats to Delight Everyone
Delight your family and friends with these easy and festive Christmas Cherry Bars, perfect for gatherings and celebrations.
- Prep Time: 20 minutes
- Cook Time: 40 minutes
- Total Time: 1 hour
- Yield: 16 bars
- Category: Desserts
- Method: Baking
- Cuisine: American
Ingredients
- 1 cup cherry pie filling
- 1/2 cup unsalted butter, softened
- 1 cup granulated sugar
- 2 large eggs
- 1 teaspoon vanilla extract
- 2 cups all-purpose flour
- 1 teaspoon baking powder
- 1/4 teaspoon salt
Instructions
- Preheat the oven to 350°F (175°C).
- In a bowl, cream together the butter and sugar until light and fluffy.
- Add eggs one at a time, mixing well after each addition. Stir in the vanilla.
- In another bowl, whisk together the flour, baking powder, and salt.
- Gradually add the dry ingredients to the wet ingredients until well combined.
- Spread half of the batter evenly into a greased baking pan.
- Spread the cherry pie filling over the batter.
- Dollop the remaining batter over the cherry filling.
- Bake for 35-40 minutes or until golden brown.
- Allow to cool before cutting into squares.
Notes
- For an extra festive touch, sprinkle powdered sugar on top before serving.
- These bars can be made a day ahead for easier holiday entertaining.
Nutrition
- Serving Size: 1 bar
- Calories: 200
- Sugar: 18g
- Sodium: 150mg
- Fat: 8g
- Saturated Fat: 5g
- Unsaturated Fat: 2g
- Trans Fat: 0g
- Carbohydrates: 30g
- Fiber: 1g
- Protein: 2g
- Cholesterol: 30mg