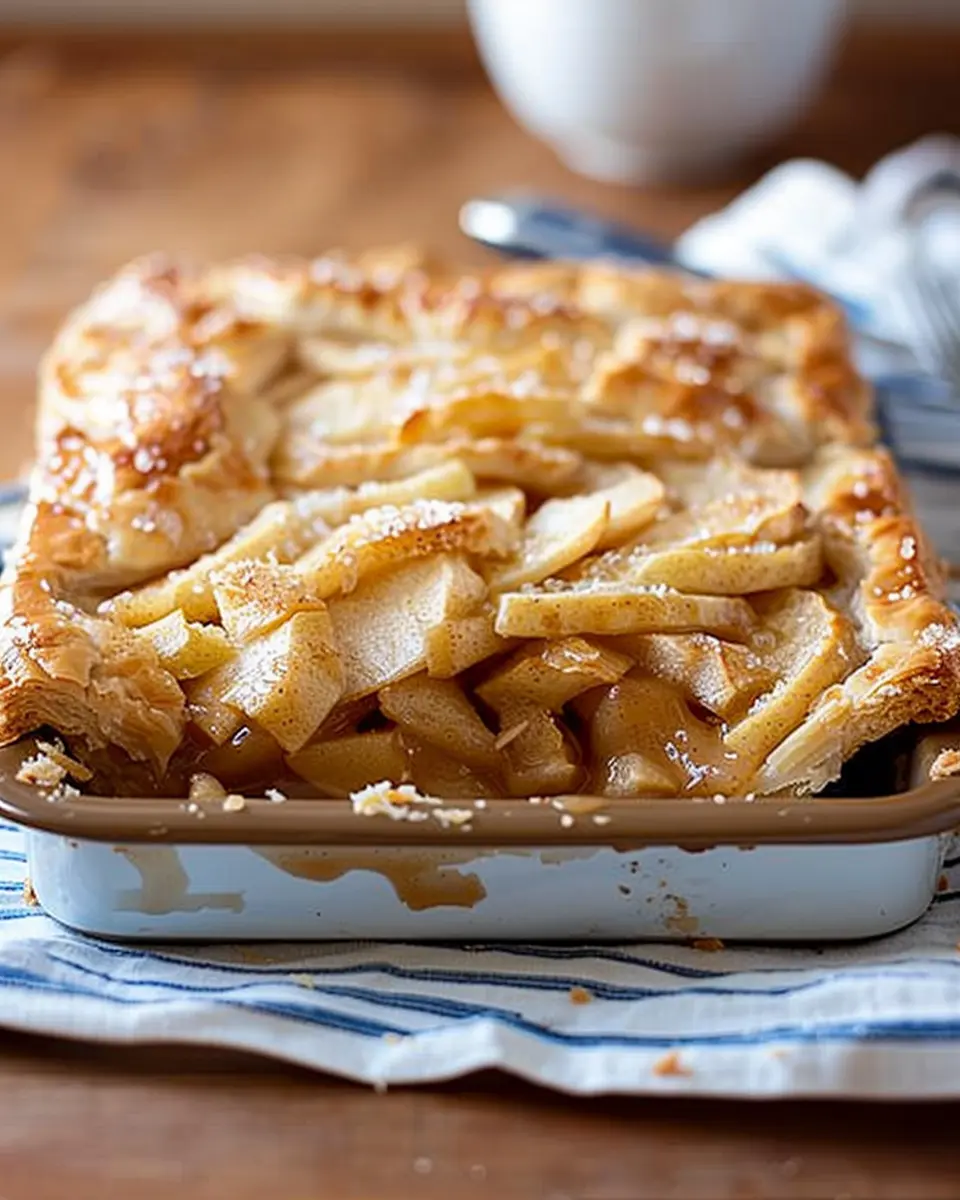
Introduction to Apple Slab Pie
Apple slab pie is a delightful twist on the classic apple pie, showcasing the same comforting flavors in a larger, more shareable format. Young professionals, especially those who are often short on time but don’t want to skimp on flavor, should definitely consider this delicious dessert for their next gathering or cozy night in.
Why Homemade Apple Slab Pie is a Must-Try for Young Professionals
Let’s face it—between work deadlines, social events, and trying to maintain a semblance of a personal life, time becomes a luxury. This is where homemade apple slab pie shines. Unlike traditional apple pies that can be tricky and time-consuming, slab pies are incredibly easy to whip up and serve. All you need is a baking sheet, some fresh apples, and a few pantry staples.
Imagine coming home after a long day, the sweet scent of spiced apples filling the air as you pull a tray of golden-brown pie out of the oven. There’s something uniquely satisfying about baking your own dessert that store-bought options just can’t replicate. Plus, homemade treats allow you to experiment with your favorite ingredients, leading to customization options that a pre-made pie simply can’t match, like adding a sprinkle of cinnamon or a drizzle of caramel.
Not only is apple slab pie easier to prepare, but it’s also an impressive option for parties or potlucks. With its generous square servings, it’s perfect for sharing with friends or colleagues. Imagine being the one to bring a slice of homemade goodness to the office, earning instant brownie— or rather, pie—points.
Additionally, making a slab pie can be a fantastic way to de-stress. According to health experts, engaging in activities like baking can improve mental well-being and boost creativity. So, not only do you get a delicious dessert out of it, but you’re also investing in your own self-care.
Incorporate seasonal ingredients by sourcing your apples from local farms or markets. Not only does this support your community, but it often results in fresher, tastier produce. Start your apple slab pie adventure today—you just might find it becomes a new favorite!
Ingredients for Apple Slab Pie
Essential ingredients for the crust
Creating the perfect apple slab pie starts with a flaky, buttery crust. For a delightful texture, you’ll need:
- 2 ½ cups all-purpose flour
- 1 teaspoon salt
- 1 tablespoon granulated sugar
- 1 cup unsalted butter, chilled and cubed
- 6-8 tablespoons ice water
These fundamental ingredients come together to create a crust that’s both easy to handle and wonderfully satisfying. Be sure to keep your butter cold; this is key to achieving that light, flaky goodness.
Key ingredients for the apple filling
The heart of any great apple slab pie is the filling. Here’s what you’ll want to gather:
- 6 cups peeled and sliced apples (Granny Smith or Honeycrisp work beautifully)
- ¾ cup granulated sugar
- 1 teaspoon ground cinnamon
- ¼ teaspoon ground nutmeg
- 2 tablespoons lemon juice
- 2 tablespoons all-purpose flour (for thickening)
Mixing these ingredients not only creates a mouthwatering flavor but also ensures a lovely texture. The combinations of tart apples with sweet spices will have your guests asking for seconds! For additional tips on selecting the best apples, check out this great guide from the USDA.
Preparing the Apple Slab Pie
There’s something irresistibly comforting about a homemade apple slab pie. Whether you’re hosting a gathering or just treating yourself, the layers of flaky crust and spiced apple filling create a delightful experience. Let’s dive into the steps to make your apple slab pie nothing short of a masterpiece.
Making the Pie Crust
The crust is the foundation of your apple slab pie, so let’s make sure it’s perfect. For a generous-sized pie, you’ll need:
- 4 cups of all-purpose flour
- 1 teaspoon of salt
- 1 tablespoon of sugar
- 1 1/2 cups of unsalted butter (chilled and cubed)
- 6 to 8 tablespoons of ice water
-
Combine Dry Ingredients: In a large bowl, whisk together the flour, salt, and sugar. This step helps to evenly distribute the ingredients, ensuring a flaky crust.
-
Cut in the Butter: Using a pastry cutter or your fingers, mix the cubed butter into the flour until the mixture resembles coarse crumbs. Remember, the key here is to keep the butter cold. This will help achieve that tender, flaky texture.
-
Add Ice Water: Gradually sprinkle cold water over the mixture, stirring gently until the dough comes together. Be cautious not to overwork it; otherwise, your pie will end up tough.
-
Chill the Dough: Divide the dough in half, shape it into disks, and wrap each in plastic wrap. Chill in the refrigerator for at least an hour—this step is crucial for achieving a fabulous crust.
Preparing the Apple Filling
While your crust is chilling, it’s time to prepare the apple filling. You’ll want to use a mix of apples to achieve a balanced flavor; Granny Smith and Honeycrisp are two fantastic options.
- 6 to 8 medium apples (peeled, cored, and sliced)
- 1 cup of sugar (adjust based on the sweetness of your apples)
- 2 tablespoons of lemon juice
- 1 teaspoon of cinnamon
- 1/4 teaspoon of nutmeg
- 2 tablespoons of cornstarch
-
Mix Ingredients: In a large bowl, combine sliced apples with sugar, lemon juice, cinnamon, nutmeg, and cornstarch. The lemon juice prevents browning and enhances the flavor.
-
Let it Rest: Allow the filling to sit for about 15 minutes. This will help the apples release some juices, making for a more flavorful filling.
For a deeper dive into apple varieties, consider researching this source.
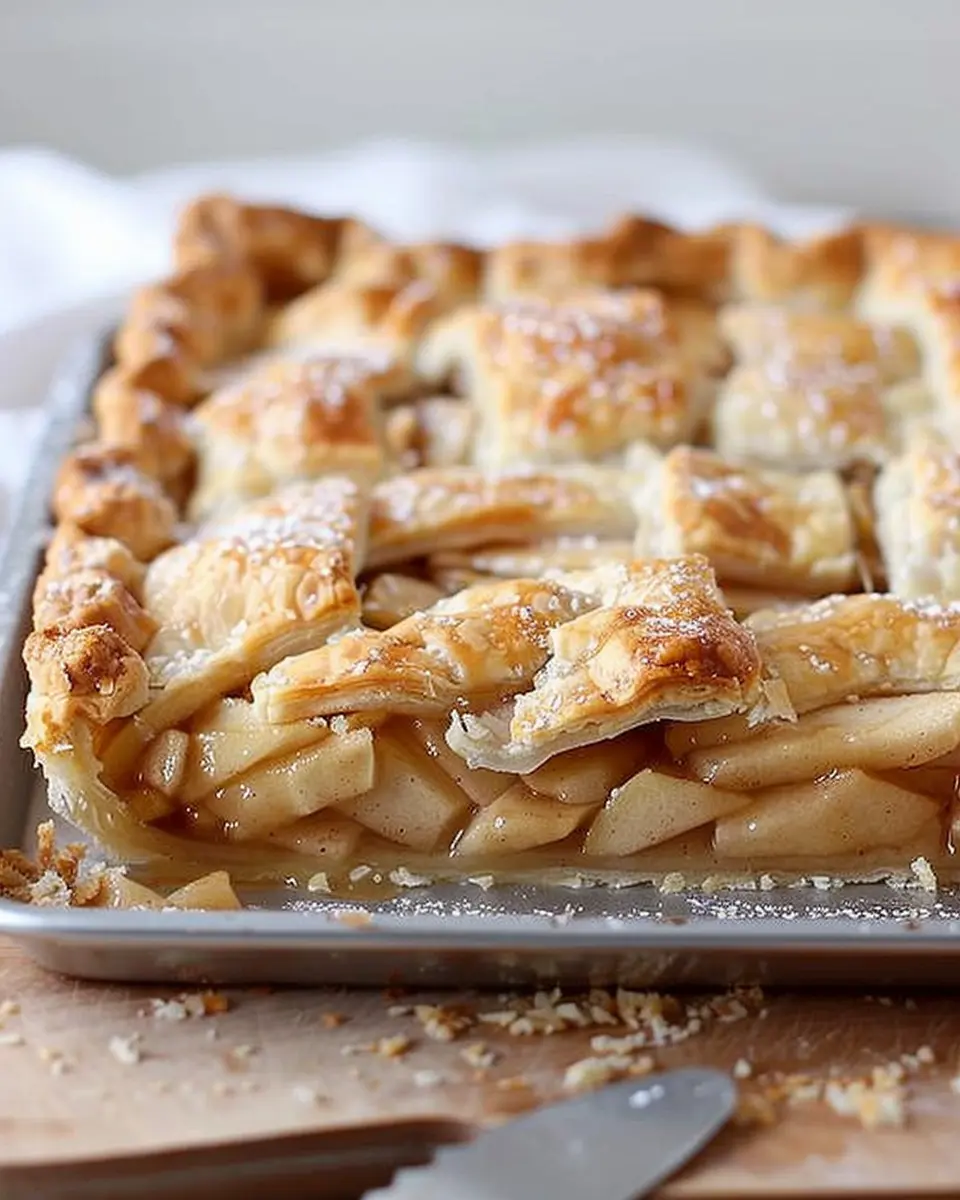
Assembling the Apple Slab Pie
Now it’s time to bring everything together. Preheat your oven to 375°F (190°C) and roll out one dough disk on a lightly floured surface.
-
Roll Out the Crust: Roll your first disk to fit your baking sheet (typically 18×13 inches). Transfer it to the pan, ensuring it covers the sides as well.
-
Add Filling: Spoon the apple filling evenly over the crust. Make sure to spread it out to maximize flavor in every bite.
-
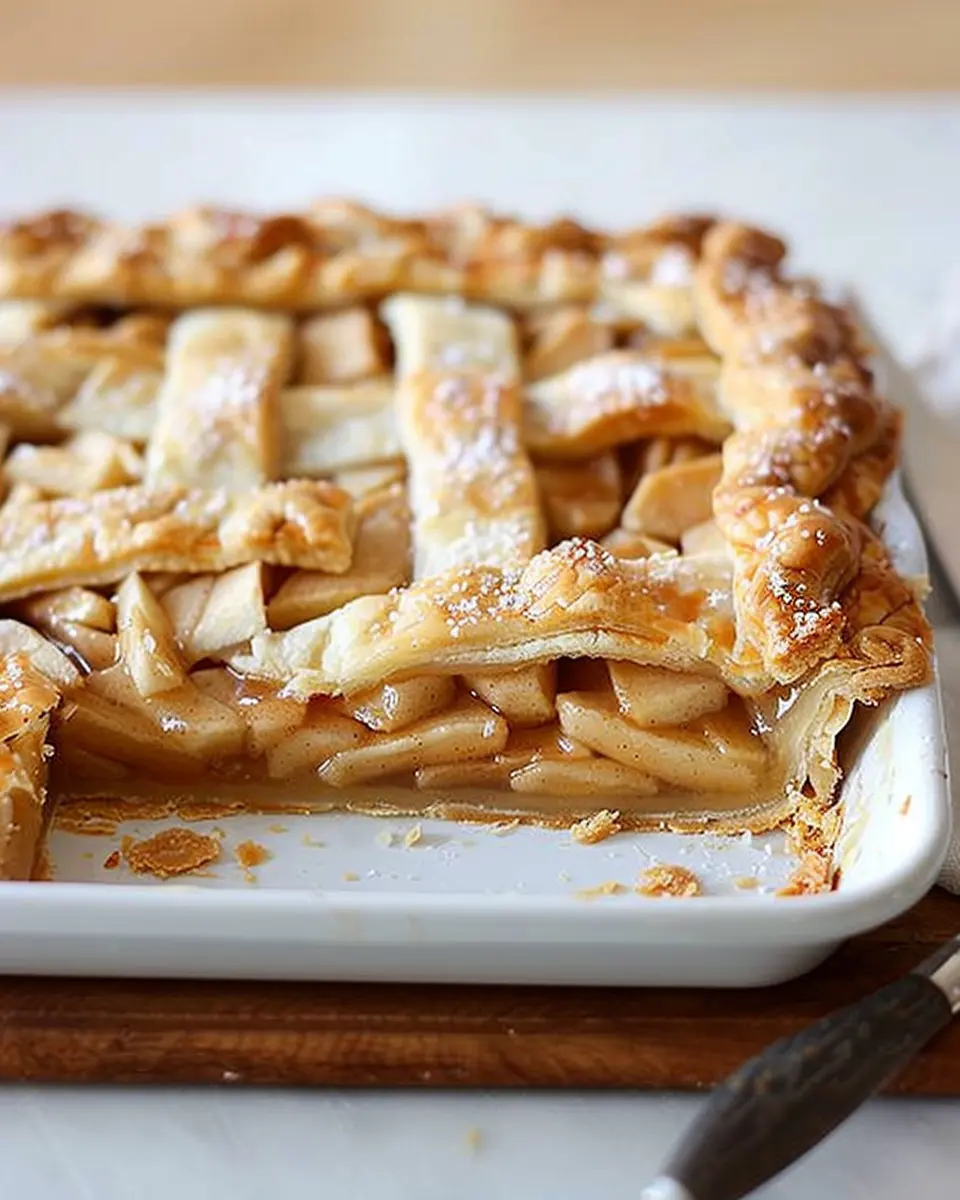
Top It Off: Roll out the second dough disk, and place it over the filling. You can create slits for ventilation or cut out fun shapes for a decorative touch.
Baking Your Masterpiece
Once assembled, it’s time for your apple slab pie to shine in the oven.
- Bake: Place in the preheated oven and bake for about 45-50 minutes, or until the crust is golden and the filling is bubbly.
- Watch Closely: Halfway through, check if the crust is browning too quickly—if so, don’t hesitate to cover the edges with foil.
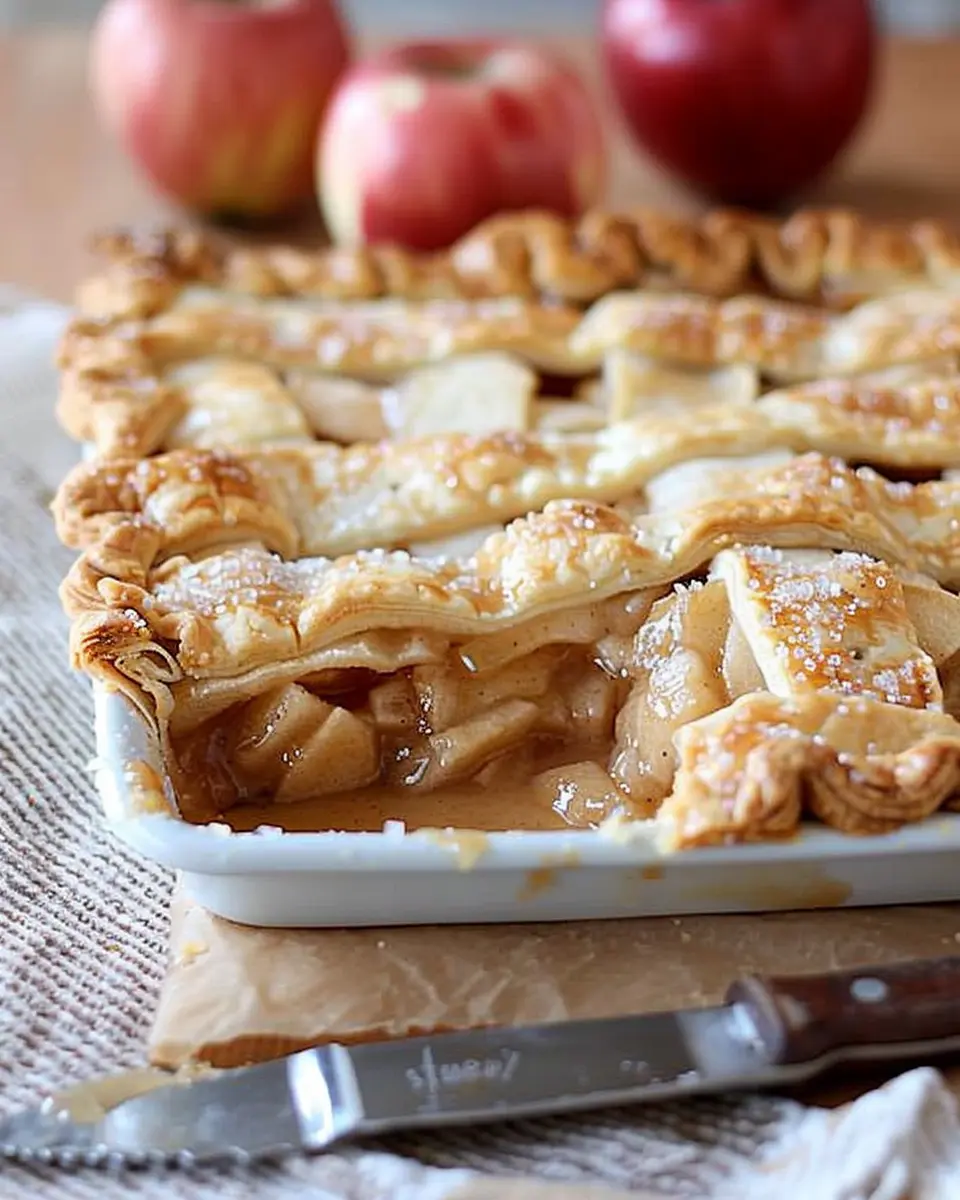
Cooling and Slicing
Once baked, your apple slab pie will need some TLC as it cools.
-
Let it Cool: Allow it to cool for at least 30 minutes—this helps the filling set and makes slicing much easier.
-
Slice and Serve: Use a sharp knife to cut generous squares or rectangles. Serve warm or at room temperature, and consider topping with a scoop of vanilla ice cream for an extra touch of indulgence.
Creating an apple slab pie is a rewarding experience that brings flavors and textures together beautifully, leaving everyone craving more. Enjoy the slice of happiness you’ve baked!
Variations on Apple Slab Pie
Apple slab pie is such a versatile dessert that you can easily tailor it to your taste or seasonal ingredients. Let’s explore some delightful variations that will elevate your baking game!
Caramel Apple Slab Pie Twist
If you’re a fan of sweet surprises, try turning your classic apple slab pie into a caramel apple slab pie! This variation enhances the rich flavors by adding a luscious caramel sauce. To achieve this:
- Prepare your apples: Mix thinly sliced apples with cinnamon, sugar, and a splash of lemon juice.
- Drizzle in caramel: Gently fold in some store-bought or homemade caramel sauce with the apple mixture.
- Assemble and bake: Pour everything into the crust, and top with a sprinkle of sea salt before baking.
This sweet enhancement gives the apple slab pie an irresistible gooey twist that will have your friends coming back for seconds!
Spiced Apple Slab Pie Option
For those who enjoy a little warmth in their dessert, a spiced apple slab pie is the way to go! Infuse your pie with a mix of fragrant spices to bring out the apples’ natural sweetness. Here’s how:
- Choose your spices: Instead of just cinnamon, consider incorporating nutmeg, ginger, and allspice. These spices complement the tartness of apples beautifully.
- Enhance the crust: Add a dash of vanilla extract to your pie crust for an aromatic touch.
- Top it off: Experiment with a crumb topping that includes oats and brown sugar for added texture and flavor.
By embracing these fun variations, you’ll not only impress your guests but also discover new favorite flavors! For more inspiration, consider checking resources like Food Network for pro tips and recipes. Happy baking!
Cooking Tips and Notes for Apple Slab Pie
Essential tools for success
Making a delicious apple slab pie requires a few essential tools to streamline the process and ensure flawless results. You’ll definitely want a large baking sheet, preferably around 18×13 inches, which gives you plenty of room for those juicy apple slices. A sharp knife and cutting board are key for prepping your apples, while a mixing bowl will help you combine your pie filling ingredients. Don’t forget a pastry brush for glazing the crust—it elevates the finished look! If you’re seeking help on where to find quality kitchen tools, check out Food52.
How to perfect your crust
The crust is where the magic begins in your apple slab pie. For a tender, flaky crust, consider using chilled ingredients. Make sure your butter or shortening is icy cold before you incorporate it into the flour. Mixing the dough just until combined helps maintain that lovely texture. If you’re feeling adventurous, try adding a pinch of cinnamon to your crust for extra flavor. And remember, letting your crust rest in the fridge for at least 30 minutes before rolling it out can make a world of difference!
Every chef has a favorite trick; what’s yours? Feel free to share any creative variations on making your apple slab pie crust!
Serving Suggestions for Apple Slab Pie
Pairing with Ice Cream or Whipped Cream
When it comes to enjoying your delicious apple slab pie, a scoop of creamy vanilla ice cream or a cloud of whipped cream can elevate the experience to new heights. The warmth of the pie contrasts beautifully with the cool, rich flavors of the toppings. For a fun twist, try flavored ice creams like caramel or cinnamon—these can add a delightful complexity to each bite. As a personal touch, consider making your whipped cream by adding a dash of vanilla or a sprinkle of cinnamon for that homemade flair.
Best Ways to Present Your Pie
Presenting your apple slab pie doesn’t need to be complicated. Here are some simple yet effective tips:
- Slice Cleanly: Use a sharp knife and make even cuts for a polished look.
- Serve Warm: Warm slices showcase the gooey filling and fragrant spices, making it irresistible.
- Garnish: Add a sprinkle of powdered sugar or a drizzle of caramel sauce for an attractive finish. Fresh mint leaves can also introduce a pop of color.
Planning to share your pie with friends? Check out this guide on dessert presentation for more creative ideas!
Time Breakdown for Apple Slab Pie
Preparation time
Making your apple slab pie is a breeze with just 30 minutes of prep work. Gather your ingredients, peel and slice those fresh apples, and roll out your dough. It’s a great time to crank up your favorite playlist and unwind a bit!
Baking time
Once your pie is assembled and ready to go, you’ll pop it in the oven for about 45 minutes. The smell of cinnamon and baked apples will fill your kitchen, making the wait worthwhile.
Total time
In just over an hour and a half, your delicious apple slab pie will be out of the oven and ready to serve. If you’re interested in tips for perfecting your crust, check out this guide. Enjoy the process, and don’t forget to have a slice (or two) while it’s warm!
Nutritional Facts for Apple Slab Pie
When indulging in a delicious apple slab pie, it’s good to be mindful of what you’re enjoying. Let’s break it down:
Calories per serving
A typical slice of apple slab pie contains around 290 calories. This makes it a delightful treat that you can enjoy without completely derailing your day!
Sugar content
Each serving has approximately 14 grams of sugar, primarily from the natural sweetness of the apples and added sugars. For those watching their sugar intake, consider opting for a lower-sugar apple variety or reducing the added sugars in your recipe.
Dietary considerations
This dessert might not fit every dietary lifestyle, but variations exist. You can make a gluten-free crust or use a sugar substitute to accommodate different dietary needs. If you’re curious about alternative ingredients, check this resource for options that align with your preferences. Enjoying the balanced flavors of an apple slab pie can definitely fit into a well-rounded lifestyle with a few thoughtful tweaks!
FAQs about Apple Slab Pie
Making an apple slab pie is a delightful experience, but it often comes with a few questions. Let’s dive into some common FAQs to help you make the most of your baking adventure!
Can I make it ahead of time?
Absolutely! One of the best things about apple slab pie is that it can be made a day in advance. Prepare the pie and store it in the fridge, covered, until you’re ready to bake it. Alternatively, you can bake it ahead of time and reheat individual slices in the oven at 350°F for about 10–15 minutes. This ensures the crust stays crispy, and the filling is warm and gooey!
What apples are best for baking?
Choosing the right apples is key to perfecting your apple slab pie. For baking, try mixing sweet and tart varieties for depth of flavor. Some favorites include:
- Granny Smith (for tartness)
- Honeycrisp (for sweetness and crunch)
- Fuji (for a balanced flavor)
These apples hold their shape well while providing that delightful apple flavor. You can learn more about ideal baking apples here.
How do I store leftovers?
If you’re lucky enough to have leftovers (and I recommend slicing and sharing to avoid temptation), store them in an airtight container in the fridge for up to 3 days. To keep the crust from getting soggy, you can place a paper towel in the container. If you want to enjoy your pie again later, consider freezing it. Just make sure to wrap it well in plastic wrap and foil, and it can last up to 3 months in the freezer.
Feel free to reach out if you have more questions or personal tips to share about your apple slab pie journey!
Conclusion on Apple Slab Pie
Why You Need to Try Making This Apple Slab Pie at Home
Making an apple slab pie at home isn’t just about baking; it’s creating memories. Picture yourself sharing this delicious treat with friends or family, each slice filled with warm, spiced apples and a flaky crust. The beauty of a slab pie lies in its generous servings—perfect for gatherings! Plus, by crafting this dessert yourself, you have the freedom to customize flavors. Want to add a touch of caramel or some extra cinnamon? Go for it! This recipe allows for creativity, and trust me, everyone will be asking for seconds. Dive into the world of home baking; you won’t regret it!
For inspiration and ideas, explore resources like The Kitchn for baking tips that can enhance your pie-making skills.
PrintApple Slab Pie: The Best Homemade Dessert for Your Family Gatherings

Enjoy a delightful slice of homemade apple slab pie, perfect for your family gatherings.
- Prep Time: 30 minutes
- Cook Time: 50 minutes
- Total Time: 1 hour 20 minutes
- Yield: 12 servings
- Category: Dessert
- Method: Baking
- Cuisine: American
- Diet: Vegetarian
Ingredients
- 2 cups all-purpose flour
- 1 cup unsalted butter, chilled
- 1/2 cup granulated sugar
- 1/4 teaspoon salt
- 6 large apples, peeled and sliced
- 1 teaspoon cinnamon
- 1/2 cup brown sugar
- 2 tablespoons lemon juice
- 1/4 teaspoon nutmeg
- 1 tablespoon cornstarch
- 1 egg, beaten (for egg wash)
Instructions
- Preheat the oven to 350°F (175°C).
- In a bowl, combine flour, sugar, and salt for the crust.
- Cut in butter until the mixture resembles coarse crumbs.
- Press half of the mixture into a greased baking pan.
- In another bowl, mix apples, cinnamon, brown sugar, lemon juice, nutmeg, and cornstarch.
- Spread the apple mixture over the crust in the pan.
- Top with the remaining crust mixture.
- Brush the top with the beaten egg.
- Bake for 45-50 minutes or until golden brown.
- Let cool before slicing.
Notes
- For a richer flavor, add a splash of vanilla extract to the apple mixture.
- Serve with vanilla ice cream for an extra treat.
Nutrition
- Serving Size: 1 slice
- Calories: 250
- Sugar: 15g
- Sodium: 200mg
- Fat: 12g
- Saturated Fat: 7g
- Unsaturated Fat: 4g
- Trans Fat: 0g
- Carbohydrates: 34g
- Fiber: 2g
- Protein: 2g
- Cholesterol: 33mg